Table of Contents
Working With Certifications
The Certification feature allows you to apply certification levels to contract items. These are customizable costs and values that you can set up to pull in automatically for tagged contract items.
- Certifications can be used on purchases or sales. Certifications can have cost and valuation effects.
- Certifications can be set to display on contract confirms, traffic documents, and printed invoices.
- Multiple certifications can be applied to a contract item, but only one certification per each certification group can be applied.
- Certification levels can be tied to contract flags.
Enabling the Certification Feature
The certification feature must be enabled before the system will display any options relating to certification.
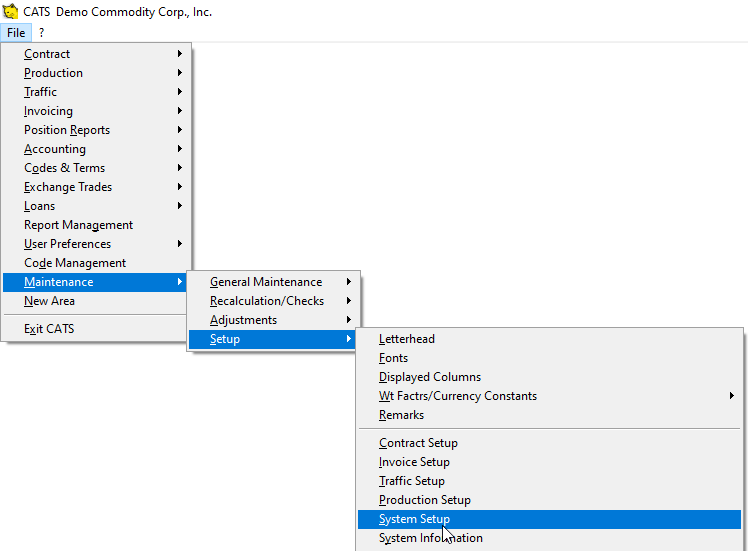
From the main menu go to Maintenance > Setup > System Setup then choose the Contract Item Screen tab.
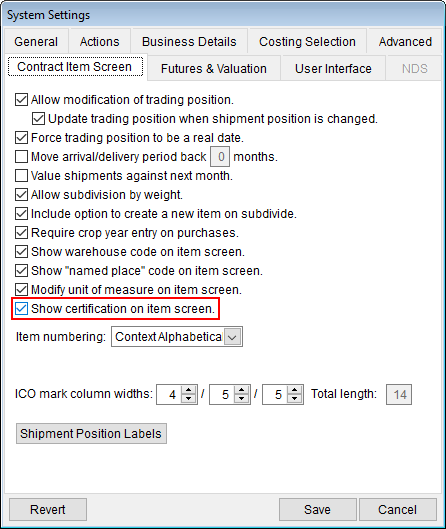
Check the option to “Show certification on item screen.” to enable the certification feature. Then select “Save” to save your changes and exit the window.
Now you will be able to manage certifications on the item screen.
Managing Certification Groups
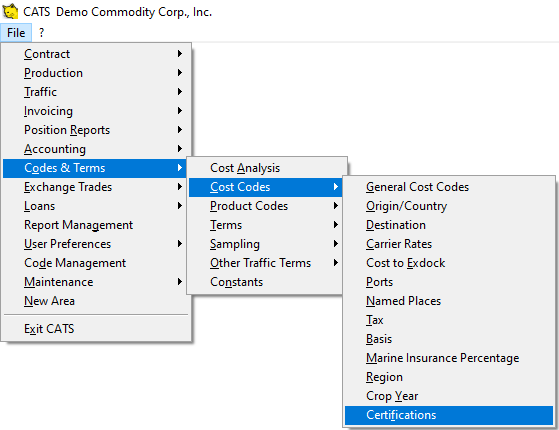
Before you add certification levels, you should set up your certification groups. First, access the certifications area. Go to Codes & Terms > Cost Codes > Certifications.
A certification group lets you denote which certification levels are allowed to overlap on contract items. Only one certification level per group can be applied to a contract item. This is to prevent you from marking items as conflicting levels.
FT ( Fair Trade) and FTUSA (Fair Trade USA) are added automatically once you turn on certifications.
You can see groups from the Certifications Scan if you pick Tools > Certification Groups.
Modify Certification Groups
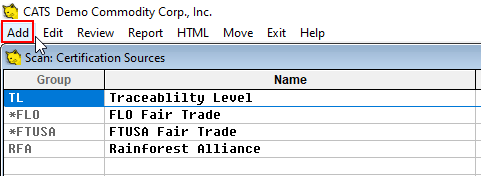
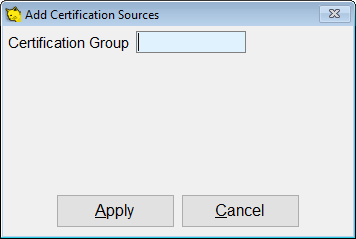
From the Certification Groups scan, select Add from the menu to create a new group, or Edit to modify existing groups.
Enter the certification group code for the new entry. This must be unique.
Pick Apply to continue.
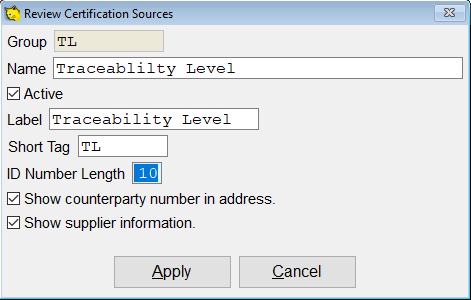
On the next screen, enter or modify details about this group.
- Name: The long name for this group.
- Active tag - Keep this checked to continue using this group.
- Label: How this group will appear in CATS on certification documents/details.
- Short Tag: Tag to use instead of the long name, when the long name usage would not fit in the display.
- ID Number Length: The length of the ID field for this group. Set this value to show a corresponding ID field on the counterparty screen.
- Show counterparty number in address. option: Displays the counterparty's ID number in their address on printed documents.
- Show supplier information. option: Displays the supplier details on documents for items tagged with certifications in this group.
Managing Certifications
Use the Certification scan to add or modify the certifications. From the main menu, go to Code and Terms > Cost Codes > Certification to open up the scan.
Add a Certification
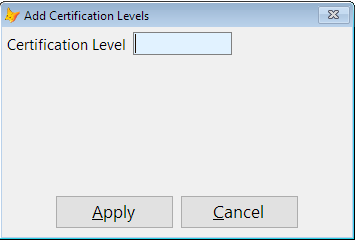
From the Certification level scan, select Add from the menu. The new certification dialog will be shown.
Enter the code for the new certification here. This code must be unique and will be what is displayed on the contract item screen.
Modify a Certification Level
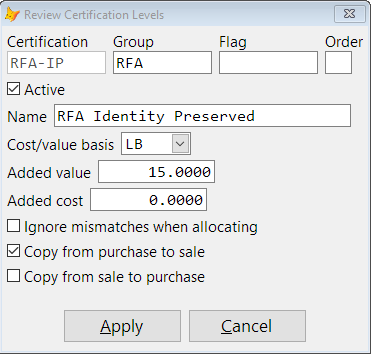
From the Certification Level scan, highlight the item you want to modify and pick Edit.
- Group Set the certification source group. Only one certifications with the same group can be attached to a contract item at a time.
- Flag Set the contract flag associated with the certification.
- Order Set the display/print order for the certification.
- Active Enable or disable the use of this certification.
- Name Long display name for the certification.
- Cost/value basis The weight basis for additional costs and valuations.
- Added value The additional valuation to apply to contracts with this certification.
- Added cost The additional cost to apply to contracts with this certification.
- Ignore mismatches when allocating Check this box to prevent CATS from prohibiting allocation with mismatched certifications
- Copy from purchase to sale Automatically copy this certification code from the purchase to sale on allocation
- Copy from sale to purchase Automatically copy this certification code from the sale to the purchase on allocation.
Counterparty Certification Numbers
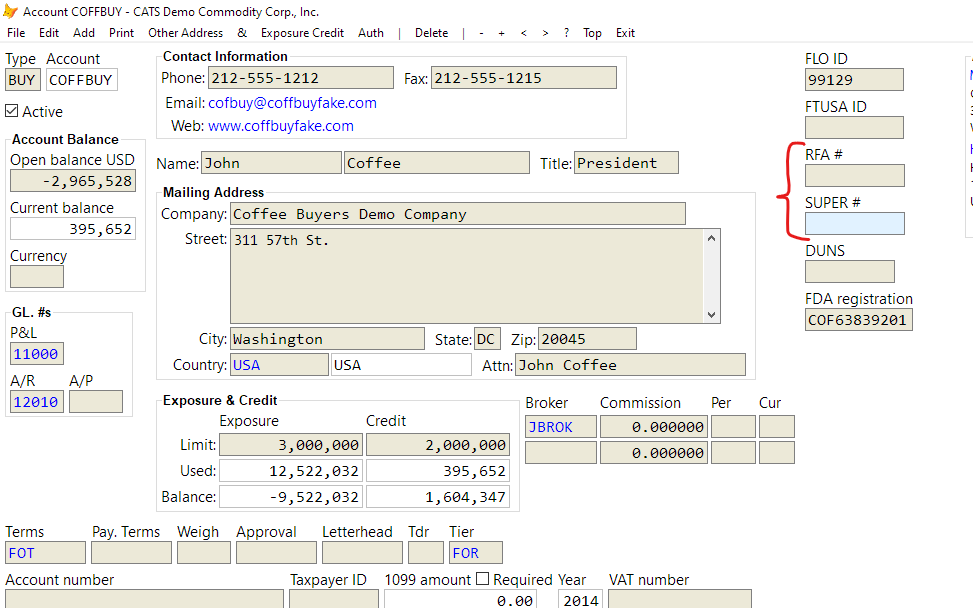
Certification source groups that have a value for ID Number Length will display a field on the counterparty account screen for that ID number.
The certification ID can be up to 20 characters long.
Showing Certifications on Documents
To configure CATS to display the certification on document output a “Certification” column should be added to the column definitions for that document.
Use the Displayed Columns option in Settings.
Show Certifications on Contract Confirms
To modify the contract confirm item listing, select the CF column definition.
Then add the “Certification” column definition.
Show Certifications on Traffic Documents
To modify the marks listing on traffic documents, select the MK column definition or the column definition specific to that traffic document (e.g. MKDO for Delivery Order).
Then add either the “Certification” column definition (for the certifications on the purchase) or “Certification Sale” for the certification on the sale.
Show Certifications on Invoices
To modify the marks listing on invoices, select the MKIV column definition.
Then add either the “Certification” column definition (for the certifications on the purchase) or “Certification Sale” for the certification on the sale.
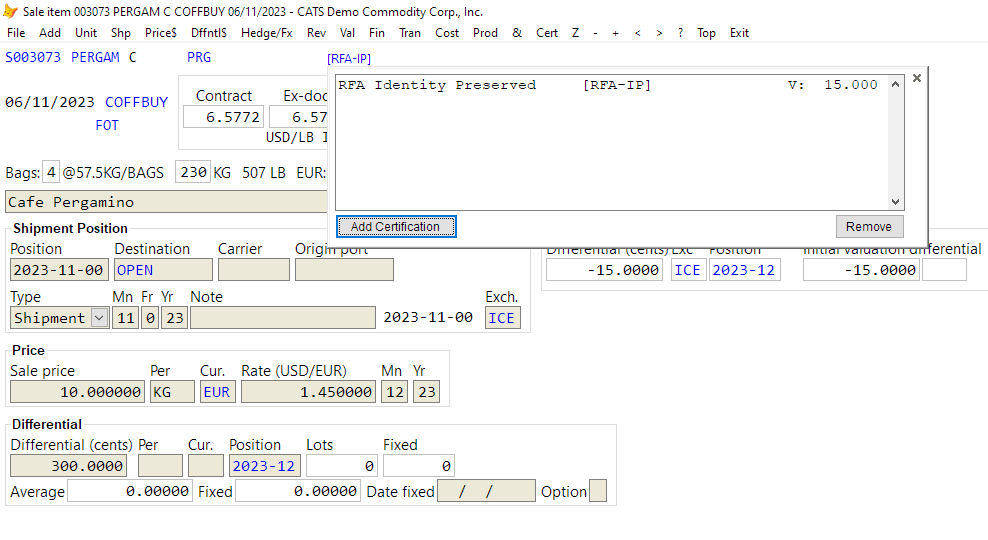
On the contract item screen at the top it will display the certifications that have already been attached. If no certifications are attached, then the link will show “Add certification…”
Clicking on the certification link or choosing Cert from the contract item screen menu will open up the certification dialog.
From the certification dialog, clicking on the Add Certification button will bring up a list of active certifications.
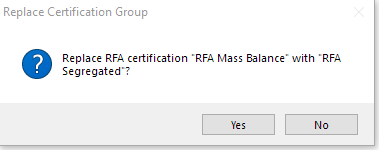
If you select a certification from the list that is part of a certification group that is already selected for this contract item, you will be prompted to replace the existing certification with the one you selected.
Choose Yes here to replace the existing certification. If you choose No, the certification on the contract item will not change.
To remove a certification, highlight it in the listing and select Remove.
Once you have finished working with the certification dialog you can close it by pressing “Esc” or by clicking anywhere on the contract item screen. The changes you made will now be reflected on the screen.
Creating Certification Documents
Using the Open Entry Form type, you can import certification information and create a custom traffic document.
Adding an Open Entry Form
Just as you would with any other form, you can add an Open Entry form from the location screen or from the main screen. Adding from the location screen allows you to pull information directly from that screen.
Refreshing the Certification Note
Once you have added marks and other information to the form, you can click on the blue circling arrows to make CATS refresh and pull in a note about the certifications on the related contract.

