Table of Contents
How to Create Inventory Invoices
Purchase and sale invoices are used to affect open inventory and the Accounts Payable and Accounts Receivable G/L accounts in CATS. These two types of invoices are created in almost the same way.
Quick Inventory Invoice Procedure
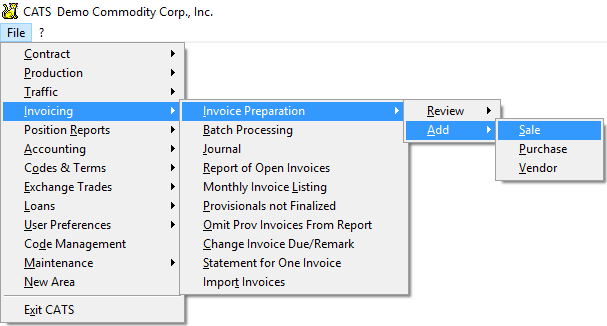
- Go to File > Invoicing > Invoice Preparation > Add > Purchase (or Sale) OR Invoicing > Add Invoice > Add Purchase / Add Sale / Add Vendor.
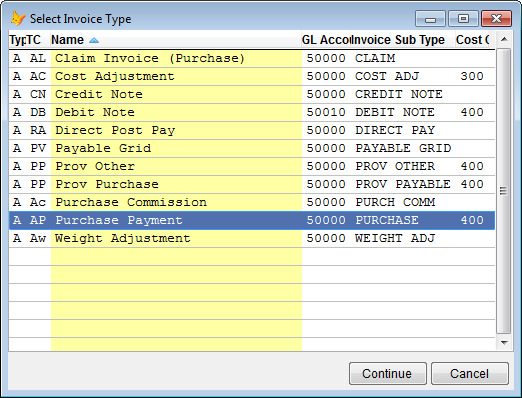
- Select a type of invoice (AP and SF are final types) and pick Apply.
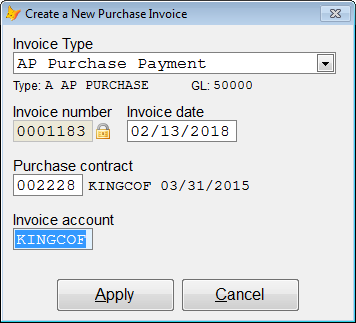
- Enter the base Contract Number, Invoice Date, and Invoice Account. You may be able to enter the Invoice Number as well. Click Apply.
- Choose Sinv (Select Inventory) from the invoice menu.
- Highlight an item in the list and click on the Tools > Select this Traffic Screen menu option.
- Pick marks on the next grid and click the Continue button.
- Repeat the above two steps as necessary, then pick Exit to return to the invoice.
- Change any fields on the invoice by picking Edit.
- Adjust items by double-clicking on them in the list of items.
- When finished with all changes, pick Prn from the menu to print the invoice and choose an output.
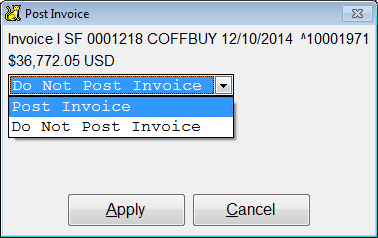
- Change the drop-down box to Post Invoice (if applicable with your company's settings) to post the invoice.
Preparing to Invoice
Before Creating a Purchase Invoice:
- An active purchase contract must exist with units and/or weight on an item.
- The following fields need to be filled in on the location screen:
- Location 1 (WH, AF, or IN)
- Location 3 (Warehouse/Ship code)
- B/L Number
- B/L Date
- Loading Port
- Destination
- ETA Date
Before creating a Sale Invoice:
- An active sale contract must exist with units and/or weight.
- Material must be allocated to a purchase contract. Because invoices use the Select Inventory procedure to choose location screens, the sale contract must have a location screen on it.
- Depending on your settings, you may see a warning if you attempt to pick inventory on a sale invoice for a location screen without a purchase invoice.
Creating an Invoice
Go to Invoices > Invoice Preparation > Add > Purchase or (Invoices > Invoice Preparation > Add > Sale for a sale invoice).
Select a type of invoice from the chooser, then select Apply to proceed to adding invoice details.
Typically, you should use PP for Proforma Purchase or AP for Purchase Payment (final invoice type with a fixed price and weight). Use SP for Proforma Sale or SF for Final Sale.
Enter the correct details for this invoice, including contract number, account code, and invoice date.
Pick Apply to continue and create the invoice.
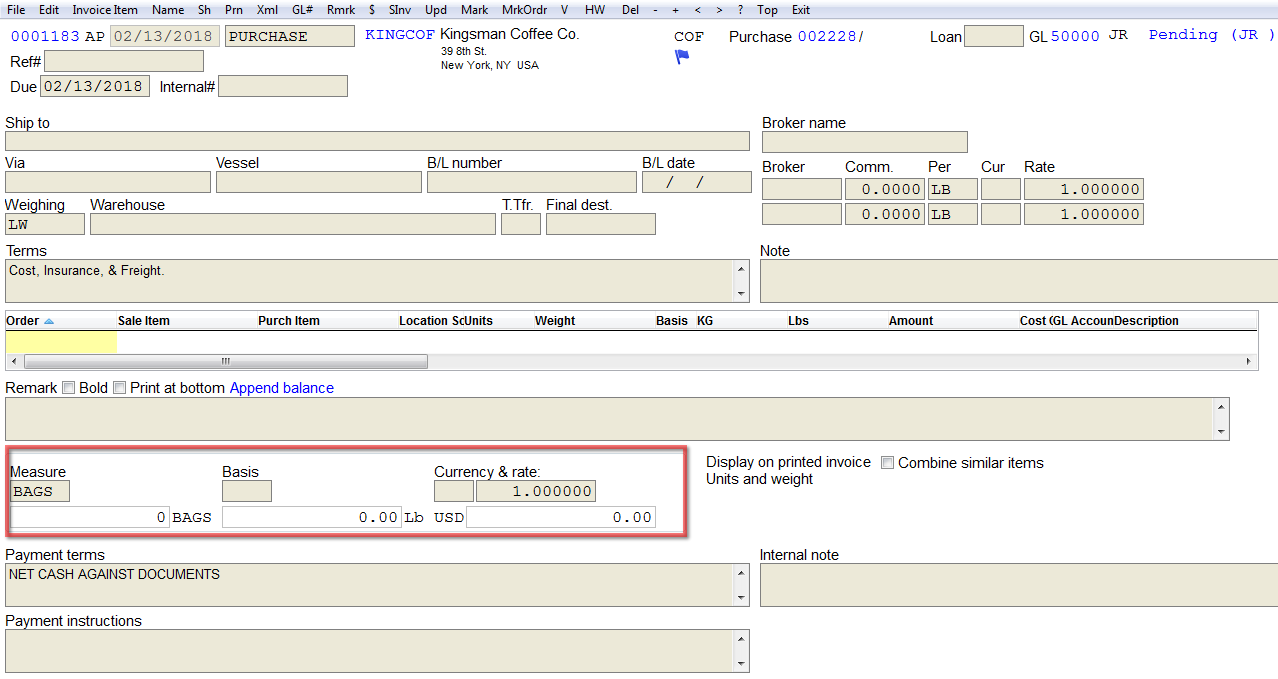
The invoice screen will be displayed (see image below).
No invoice items currently exist for this newly created invoice, so the amount on the bottom is 0.00. This invoice cannot be posted until it has invoice items with units, weight and/or an amount on it.
You can either add material manually by adding an invoice item and choosing a contract item to reference, or you can select inventory (a location screen) and CATS will fill in the data for you.
Selecting Inventory to Create Items
Choose SInv from the menu to pick inventory for this invoice.
A list of traffic screens for the contract number you selected will be displayed.If a screen is available (not already selected on another invoice), the Selected column will display Available. If the material is on another invoice, this column will show Reserved. Click in any available field for a single screen, then on the menu select Pick or Tools > Pick this Traffic Screen to choose the highlighted screen.
Click on each mark to copy from the location screen to this invoice, then pick Continue.
The select inventory screen will show Selected in the Selected column.
Pick Exit to save these changes and return to the invoice.
Editing a Traffic Screen
At the moment of attempting to pick a traffic screen, you may receive the warning about fields not filled in on the location screen. This warning is in place to prevent items that should not be invoiced (due to status or current location) from being selected as inventory on an invoice.
Instead of exiting and editing the traffic screen from the main menu, you can pick Tools > Edit this Traffic Screen to have CATS call up the location screen in edit mode, where you can fill in whatever data is missing.
Selecting Multiple Screens at Once
To choose all available (literally marked Available in the scan) screens for this invoice, use the Tools > Pick All menu option. CATS will only allow you to “Pick All” if the traffic screen is complete.
If you want to view a different contract, go to Tools > Select Contract to View.
Then proceed to choose a contract to view. Press Continue to view the inventory available.
Editing Invoice Fields
Select Edit from the toolbar menu to change fields on this screen, such as the Payment Terms, Remark, B/L Number, Due Date, etc. Fill in the fields as desired, then pick Save from the top menu to continue.
Special fields to review when editing an invoice include:
- Payment Terms are pulled in automatically from the Payment terms code in the Codes & Terms file.
- Payment Instructions can be stored in the Remarks file.
- You can use the Append balance link to add a list of all open invoices for this account to the Remark field. This is useful to send to customers.
Creating Invoice Items Manually
You can attach extra charges (due you or charged to you) to inventory invoices by creating manual invoice items.
From the invoice screen, select Item > Add Invoice Item.
Adding Invoice Subtotals
You can create separate sub-totals for your invoice items listing. Subtotals are special items that print out the subtotal for a selection of items. The order used when creating the items and subtotal lines determines which items show up in which section.
From the invoice screen, select Item > Add subtotal
Invoice Subtotal Options
Subtotal lines can have individual settings to control which fields are totaled and how the subtotals are calculated.
- Print if empty. If enabled, this subtotal will display on the printed invoice even if it doesn't have any items within it.
- Nested subtotal. If enabled, this subtotal line will be nested inside a parent subtotal.
- Running totals. If enabled, the subtotals will resume after this entry rather than resetting to 0.
Multi-Contract Invoices
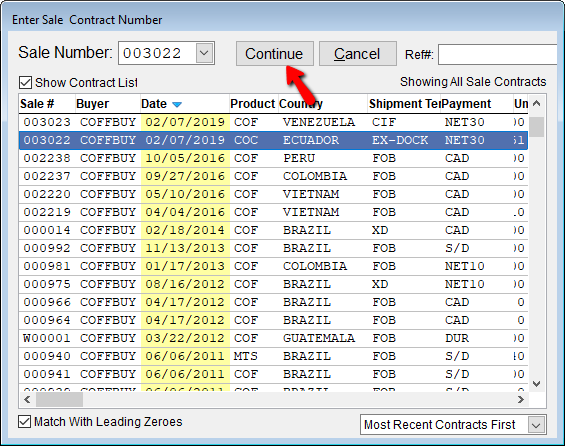
You can select inventory to include on this invoice for more than one contract, as long as the contract has the same account code. From the Sinv scan, pick Tools > Select contract to view.
CATS will call up a chooser of all contracts for that account code. Choose a contract to view. Press Continue to view the inventory available.
Then proceed with selecting inventory as normal.
Marks on Invoices
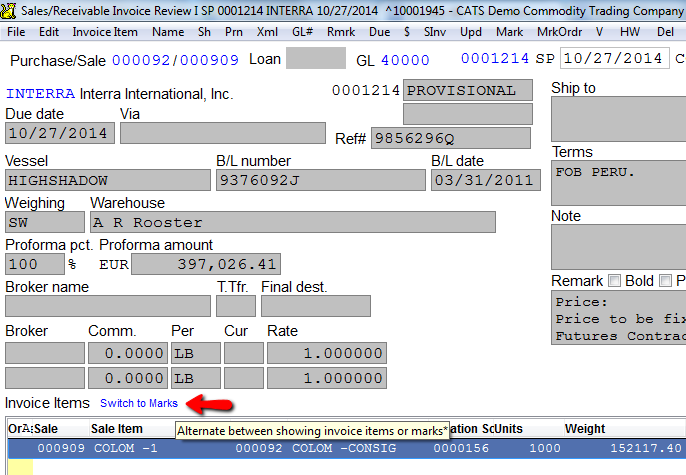
To see the marks displayed as a list (as the items are shown), click on the blue Switch to marks link just above the invoice item list.
As with marks in other areas of CATS, if there is no value in a field, that field will not show up in the marks list on printed documents.
Click Switch to Items to return to viewing a list of items.
On unposted invoices, you can also view the marks by selecting Mark from the menu. You can edit mark details as you would on location screens here.
Choose Edit from the screen, then fill in the details and pick Apply to save.
Sale Invoices
You can choose to add items from more than one sale contract (instead of from more than one purchase contract). The first sale contract will show up next to the purchase contract as shown here:
On sale invoices, you may get any or all of the following warnings if the conditions for creating a sale invoice have not been met.
Not Paid For
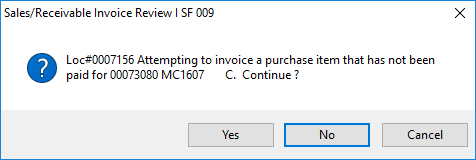
You may see a warning that an item has not been paid for if you attempt to select the inventory for a location screen that does not have a purchase invoice on it.
Depending on your company's settings, you may be able to proceed if you click Yes, or you may be forced to create a purchase invoice before you can select this material for a sale invoice.
No Final Price
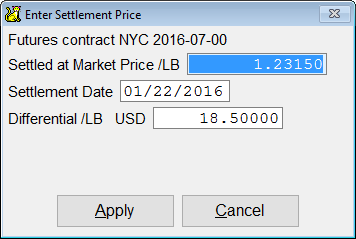
This warning can appear on both purchase and sale final invoice types. If the contract for this material has no fixed contract price (only a differential price), you will be asked to pick a Settlement Price to be used on the invoice.
Enter a price for CATS to use, then pick Apply to proceed.
No Delivery Order
For sale invoices, CATS will warn you if there is no Delivery Order number on the location screen. You can still proceed by pressing any key or clicking anywhere on screen.
Invoice Item View
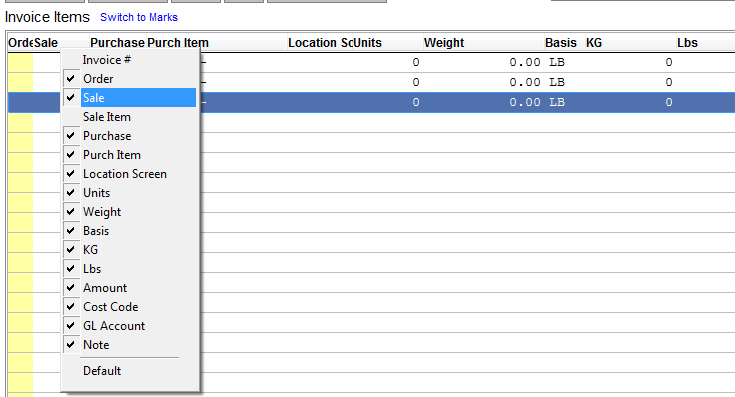
Each user can customize the columns shown on the invoice items and marks grid. Right-click on any column heading and check or un-check each column there.
You can drag the column to rearrange the order. You can also click on a column to order by that column. This view will save for your user for all invoices.
Name and Ship To Address
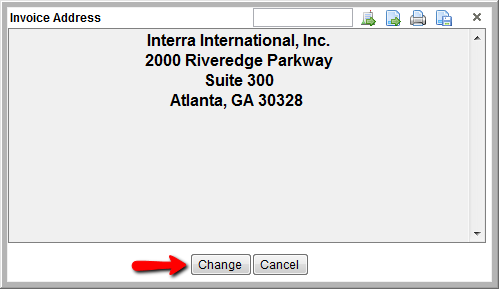
To change the address on the invoice, pick Name from the menu.
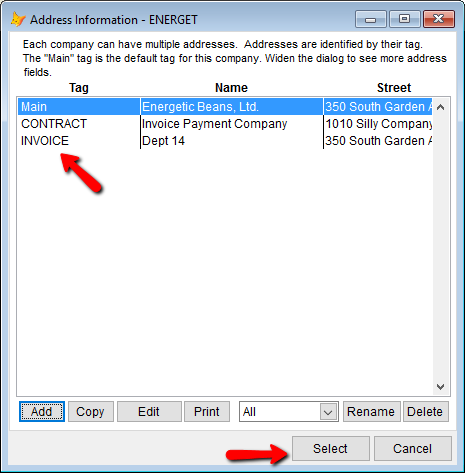
You can manually enter the address or click Change to choose from a list of addresses for this account.
Choose another address, or add a new one, and pick Continue to proceed. Addresses tagged as INVOICE will automatically be used for all invoices for that account.
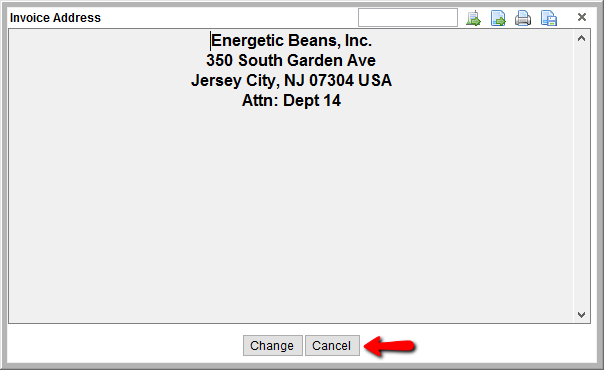
When you have finished entering an address, pick Cancel to close the manual address box.
You can add a ship to address to invoices by picking Sh from the menu. The Ship To field will be filled in.
Here, again, the multiple address tool will be called up and you can choose from a list of addresses or create a new one for this account. You can follow the steps for the Name address above to enter a new Ship To address.
Printing and Posting of Invoices
After you create an invoice, you must print and post it to have it take effect. Posting creates entries in the general ledger for this invoice and affects the inventory on the accounting side as well as the “Balance” due on the contract.
Charged and Billed columns, and in the Ledger Scan.
Select Prn from the invoice menu, then print the invoice as you would any document in CATS. When prompted, change the drop-down box to read Post Invoice and pick Apply.
You may see a posting progress box. Click any key to proceed.
When CATS is finished posting , you will notice that the menu has changed. You no longer have the option to Edit, Add Invoice Items, SInv (select inventory), HW (put a hold on the invoice to prevent posting), or Del (delete).
Also, you can see that this invoice is posted by looking at the status in the top-right corner.
Commission Invoices
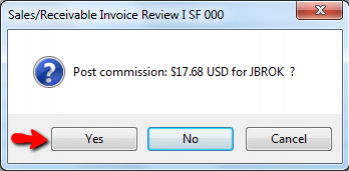
If there is a commission on this invoice (pulled in from the contract or entered on the invoice) you will be asked if you want to post the commission. The commission invoice functions as a separate invoice record in the general ledger, with the same number but a different account code (that of the broker).
Select Yes to post the commission invoice.
Commission invoices can be unposted from the invoice unposting area.

