Importing Bank Transactions
The Import Transactions feature allows you to import transactions directly from your bank statement into CATS. Every bank has its own format for their electronic documents. To set up a new bank, it will be necessary to submit a sample statement to NDS to facilitate importing the records.
Quick Steps
- Download the bank statement from your bank's website into any folder that CATS can access.
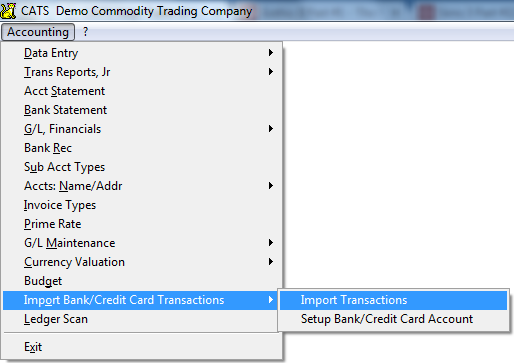
- Go to Accounting > Import Transactions from the main menu.
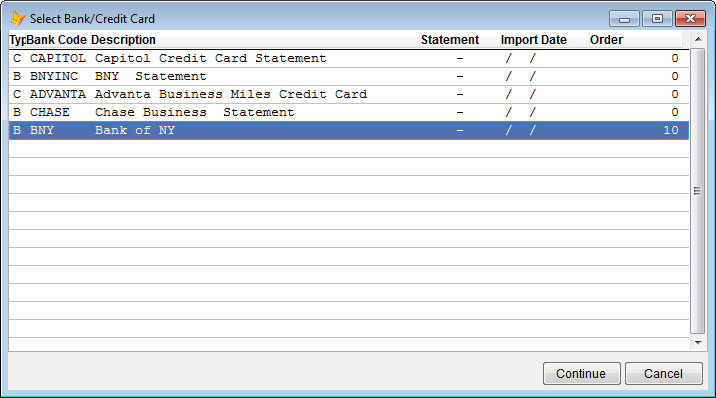
- Select a bank or credit card from the bank chooser and pick Continue.
- Choose Tools > Import Transactions from the menu.
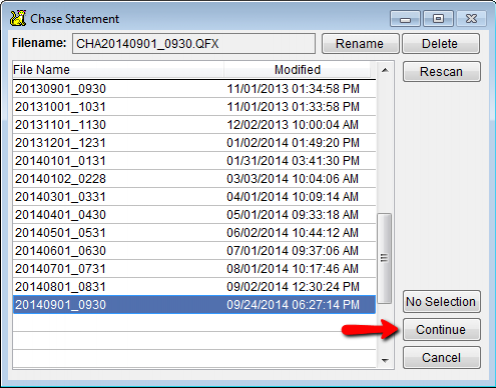
- Select a bank statement file from the list and chooser Continue.
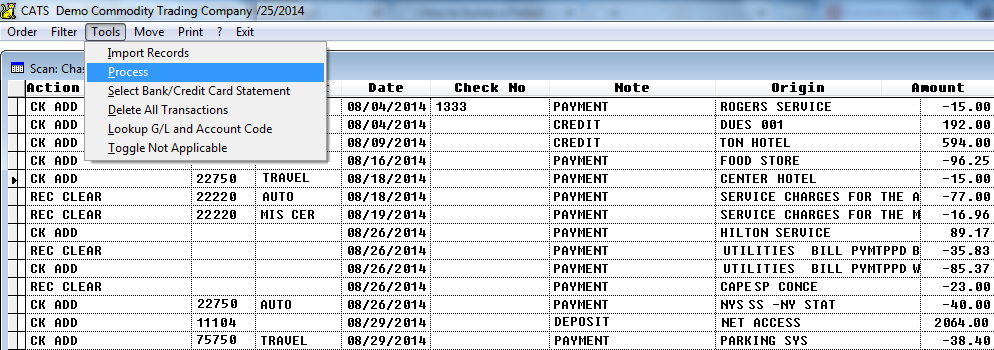
- From the top menu, pick Tools > Process. Note which items have cleared.
- For all uncleared items, enter account codes and G/L numbers or put an
XXin the Action column to ignore them. - When finished adjusting transactions, pick Tools > Process again.
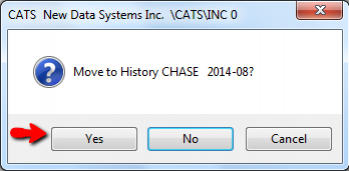
- Select Yes when prompted to move transaction to history.
Preparing to Import
First you need to download the electronic bank statement from your bank's website. Usually, this is available as a CSV or QFX file. Download the file and place it in the “Transfer” folder of your CATS directory.
In CATS select Accounting > Import Transactions from the main menu to start the process in CATS.
CATS displays a list of the banks it knows about. Select the bank or credit card to use for the import and pick Continue.
Importing Transactions
This will bring up the list of imported transactions for the selected bank. Normally, when you start this procedure the list will be blank (as the previous month's statement will have been processed and archived already). CATS stores the bank statement information so you can exit this screen at any time during the process and pick up where you left off later on.
To import the bank statement, select Tools' > Import Records from the toolbar menu.
CATS will display a list of the bank statement export files that it can see. Select the appropriate file and click on Continue to proceed. (If you do not see the statement file listed, you will need to ensure that you downloaded the file to the correct folder.)
Note: The bank statement file does not have to be strictly for one month based on date.
Clearing Transactions
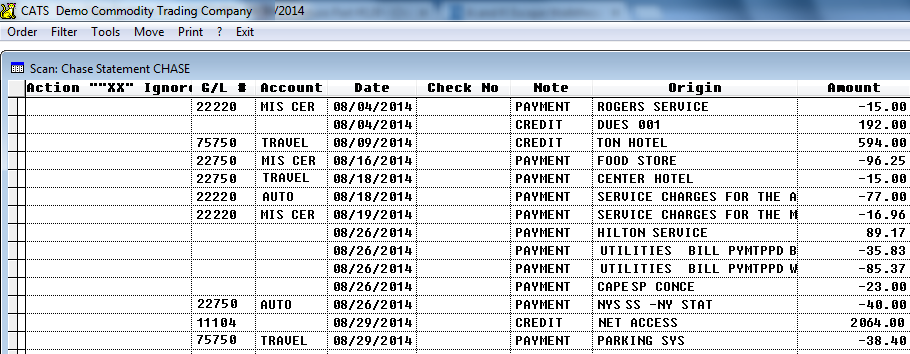
CATS will now pull in a list of transactions from the file and display them to you in the list of imported transactions.
You can manage the list of transactions by entering values in the Action “XX” Ignore , G/L # , and Account columns.
The Action “XX” Ignore column displays the action taken by CATS (if any) as it processes the list. (Until you Process these transactions, this column will be blank.) You can also force CATS to ignore a transaction by entering XX in this column.
Enter a G/L # and/or an Account code in the appropriate fields to assign them to a transaction. CATS will recognize and automatically identify transactions that use accounts and GL#s from prior months. This can save you time if you have repeating monthly transactions.
Once you have made your entries, it's time to compare the list of transactions against your GL. Select Tools > Process to run through the list and apply the information from the bank statement to your GL.
There may be transactions on the bank statement that CATS couldn't find or properly process. It may be necessary to exit this screen and enter new transaction or adjust existing transactions to match the bank statement. Then return and select Process again.
Once all the transactions are successfully cleared (or ignored with “XX”) CATS will prompt you to move the current transaction list to the history file. Select Yes to clear the transactions from the list, otherwise the cleared transactions will remain in the list. It is recommended that you archive the transactions as it clearer after each successive month.
Processed transactions will be marked with the bank statement month and year and will now appear in the Ledger Scan.
