Managing the IP Whitelist (Cloud Host)
CATS uses a IP firewall to secure your cloud hosted environments. When employees are on the road, or working from home, the IP whitelist can be updated to permit them access. These rules can be set to expire after a certain period of time, and can also be modified or removed as you require.
To access the IP whitelist, go to File > Maintenance > General Maintenance > IP Whitelist
Working with the IP Whitelist Dialog
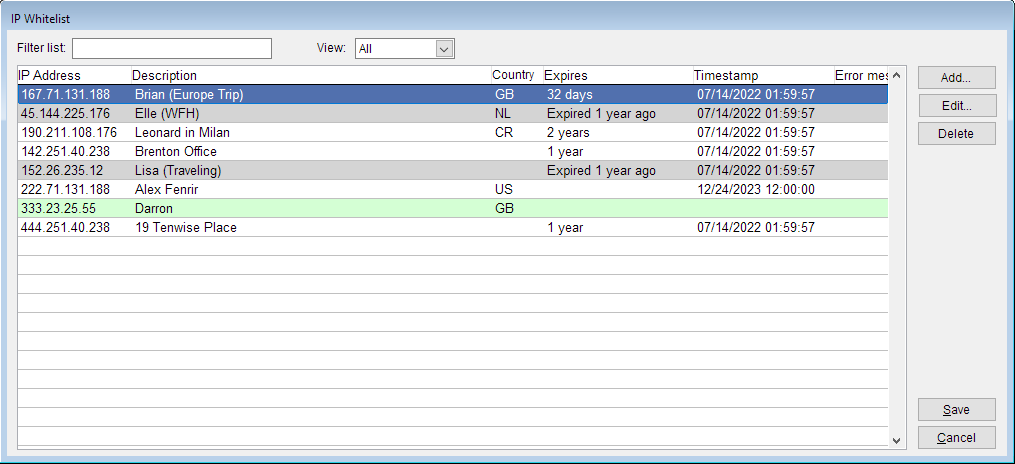
The IP Whitelist dialog displays all the firewall rules that have been established for your company's cloud host. From here you can filter the list of rules, add a new rule or modify/delete an existing a rule.
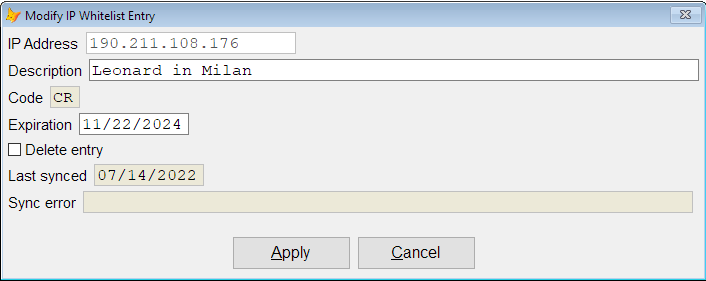
- To add a new entry, click on the “Add…” button and enter the IP address, the description, and (if required) an expiration date.
- To modify an entry, select it in the list and click on “Edit…” (or double-click).
- To delete an entry, select it in the list and click on “Delete”
Once you have made your changes, select “Save” to close the dialog and apply your changes.
It may take up to 5 minutes for the changes to propagate to the server's IP whitelist.
Filtering the IP Whitelist
Each record in the whitelist represents a single IP address used to access the cloud host. The entries can be in one of several states:
- Active: the IP address rule has propagated to the server and is currently active.
- Pending (green): the IP address rule has not yet propagated to the server.
- Expired (gray): the IP address rule has expired and access using it will be denied.
- Error (red): there was an issue applying the IP address rule to the server.
- Deleted: the IP address rule was deleted.
The IP whitelist dialog can be filtered to display each of these states independently. By default, deleted rules will not be displayed.
Additionally you can use the Filter text field to search for either a specific IP address or description.

