Allocating from a Location Screen
To begin this process, navigate to the location screen you wish to allocate. Then choose Alloc from the menu [1].

This will bring up the dialog showing the allocation status of the location screen and a list of the allocations.

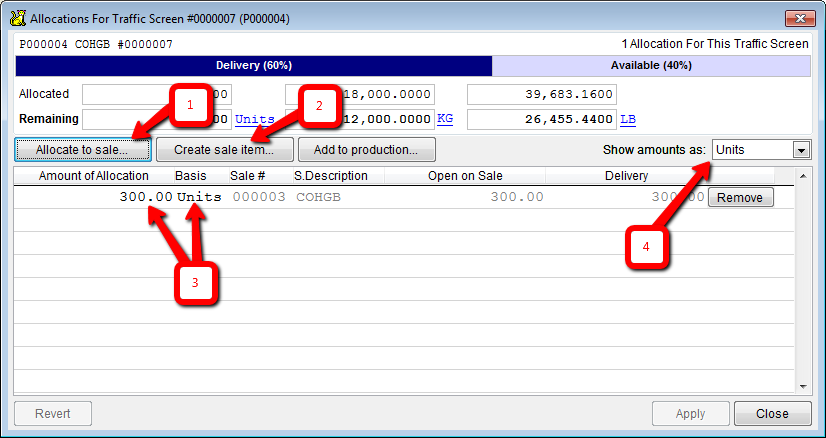
You can use this dialog to adjust the existing allocations, add a new allocation to an existing sale item or a new sale item, or create a new production run with material from the location screen.
You can adjust the amount of the allocation by changing the value entered in the “Amount of Allocation” column [3]. You can change the basis display for each individual item or for the entire dialog [4]. You can change the allocation amount and basis or remove the allocation entirely at any time (though you cannot have less material allocated than is on delivery).
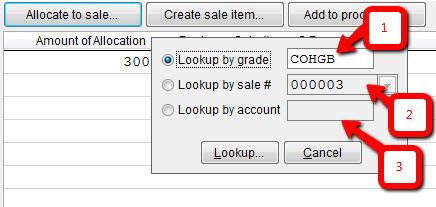
To allocate to an existing sale contract, click on the button labeled “Allocate to sale…” [1]. Then enter the information to identify the sale item you wish to allocate. (See this page for information about creating a new sale)

You can select the sale item using a grade code [1], the sale contract number [2], or an account code [3]. CATS will prompt you to select the exact sale item record and the allocation will be created.

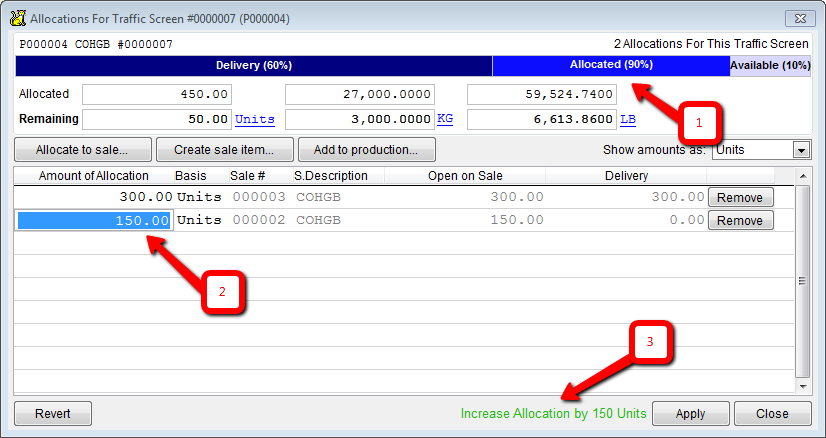
By default, CATS will create an allocation with the minimum of the unallocated units on the location screen and the unallocated units on the sale item. If either the sale or the location screen has no unallocated units, then the allocation will be created with zero units. (In this example, the location screen has 300 unallocated units but the sale item only has 150 units unallocated so the new allocation is created with 150 units to match the sale [2].)
The overall change to the allocation is displayed at the bottom of the dialog [3]. Click on the button labeled “Apply” to save all the changes to your allocations.
Click on “Revert” to undo all the changes since the last save (or since the dialog was opened).
Click on “Close” to close the form. If you have any un-applied changes, CATS will prompt you to save them when you close the dialog.

The location screen updates to show the newly created allocations.