Isolating a Period in CATS
Isolating a period creates a separate folder of data that preserves the state of the data as of the date of isolation. This allows users to review the accounting, traffic, and invoice information as it was on a specific date. Isolated areas are also essential for closing the accounting year and providing accurate end of month numbers.
A few tips about isolations:
- Typically, isolations are done on a month-end basis. However, you can choose to create periods only for each quarter or even on a weekly basis.
- CATS has room for 18 accounting periods. These periods correspond with the columns on accounting reports.
- Isolations should be done after all traffic data has been entered into the system, but isolating a period should be done as close to the first day of the next month (or period) as possible to get the most accurate traffic data.
How to Isolate a Period
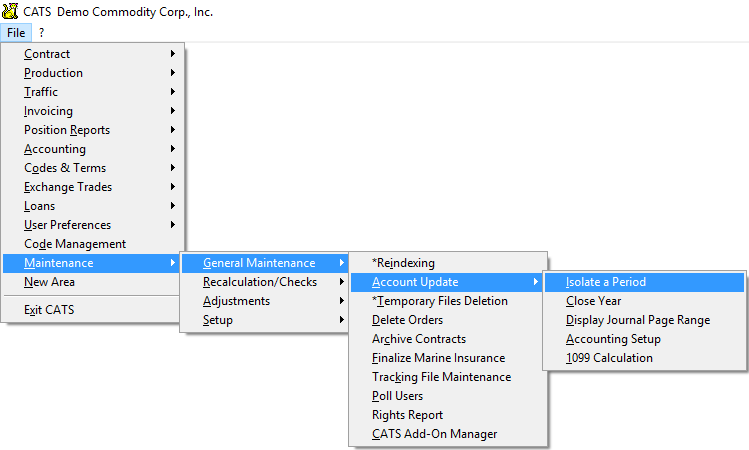
To isolate a period, go to Maintenance > General Maintenance > Account Update > Isolate a Period.
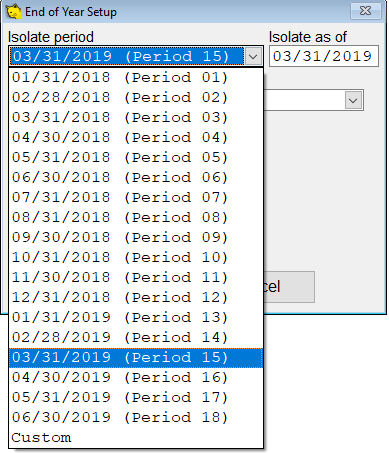
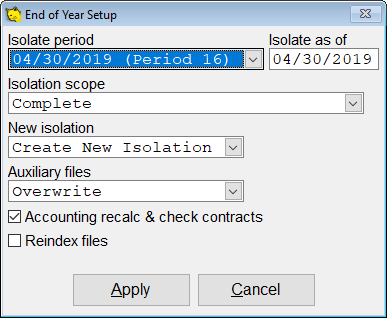
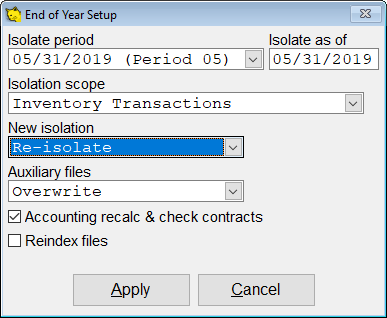
The current list of periods available to isolate will be displayed. Select the period to isolate and ensure that, for new isolations, the setup is as shown in the image below.
- Isolate period - Use the drop down to choose the period you want to isolate.
Click here for example - Isolate as of - This date will be the date of the isolate period.
- Isolation scope - Complete
- New isolation - Create New Isolation
- Auxiliary files - Overwrite
- Acct/Recalc,Ck Contracts - Check box for Yes
- Reindex - Leave un-checked for No
Then choose Apply to continue.
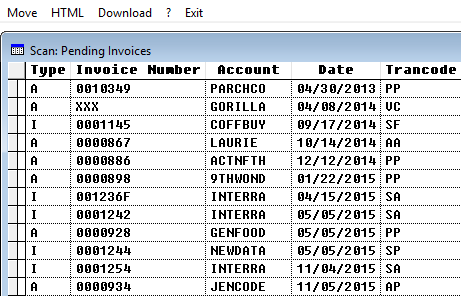
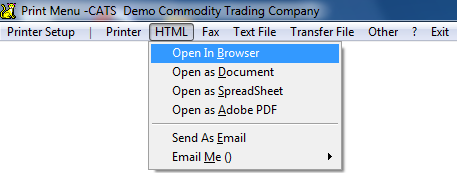
If there are any pending (unposted) invoices for the current or previous periods, CATS will display a list. Select HTML > Open in Browser to print the list of invoices or Exit to proceed.
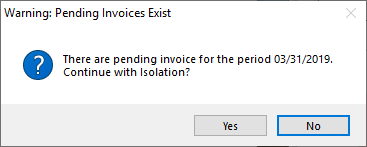
CATS will ask you if you wish to continue. Select Yes to continue with the isolation process or No to leave the process and either delete or post the invoices.
You will need to choose where to print the isolation progress report. Pick an output to continue.
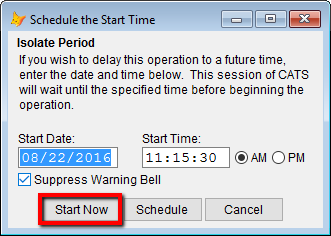
If you choose Yes, CATS will ask when you want to begin the isolation. Select Start Now to begin the isolation procedure.
As files are copied to the isolation, the progress will be displayed in the upper-right corner of the screen.
When CATS has finished with the isolation, you will see a notification in the top-right of the screen that declares the isolation is finished. To close this message and return to the isolated area, click the mouse or press any keyboard key.
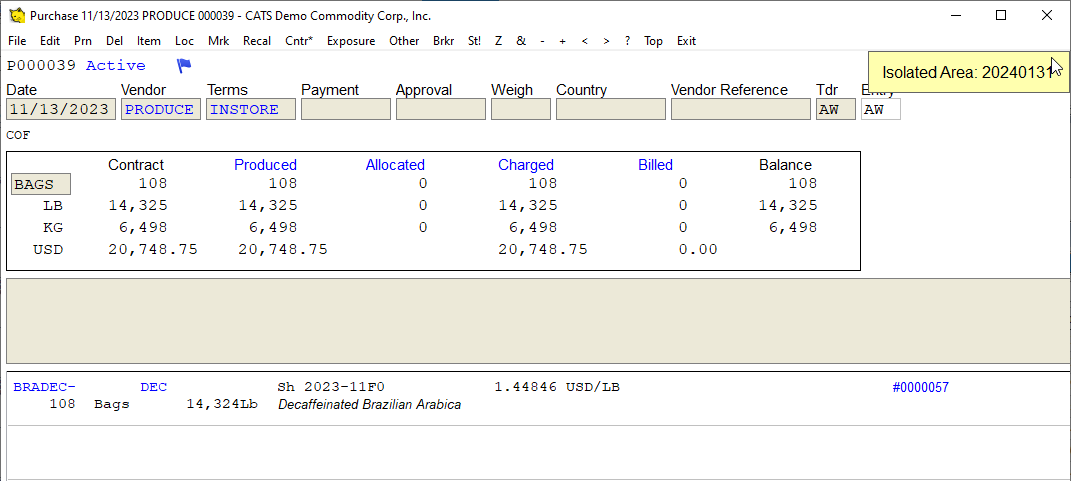
You will now be in the isolated area. You can identify if you are in an isolated area by looking at the message in the top-right of the screen, which identifies the name of the area you are in.
Re-Isolation
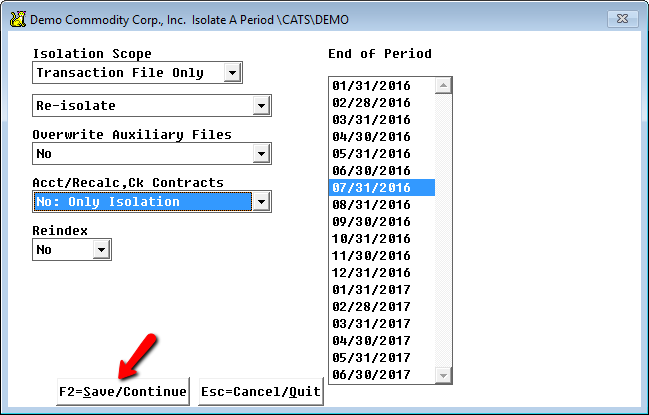
Occasionally, you may need to re-isolate a period you have previously captured in an isolation. CATS allows you to do so, with a limited scope. Choose Re-Isolate and then Apply to continue.
Updating an Existing Isolation
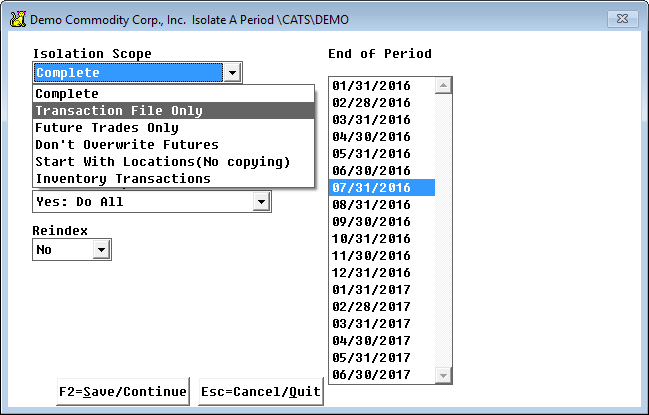
To pull newly entered transactions with dates from a previous month into an existing isolated area, you must first determine what type of information you wish to capture. Begin the isolation process as described above, but you will need to change the Scope of the isolation.
Options for Scope of the Re-isolation:
- Transaction File Only - Only copy accounting ledger items.
- Futures Trades Only - Only copy futures trades.
- Don't Overwrite Futures - Copy all but futures trades.
- Start With Locations (No copying) - Use this only to back out location changes from the isolated area, using the history file.
- Inventory Transactions - Copy only invoices.
Depending on what you choose, CATS will copy certain files into the isolated area.
Here is the typical setup we recommend for re-isolating a period, barring the scope as discussed above.
When the selections are correct, follow the steps above to continue with the re-isolation.
Creating a New Isolated Period
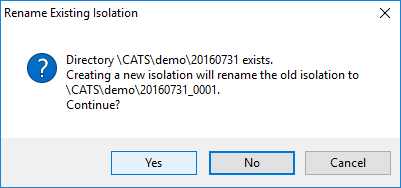
You can also choose to create a new isolated area for a period that has already been isolated. CATS will prompt you to do this if you choose Scope: Complete. If you want to move the existing isolation to a new folder, you can do so by choosing Yes.
This will allow you to create multiple independent copies of your isolation data for different purposes.
Working in Isolated Periods
You may need to print reports or access data from the isolated areas, or change information in the isolated area. You can do so from the isolated area.
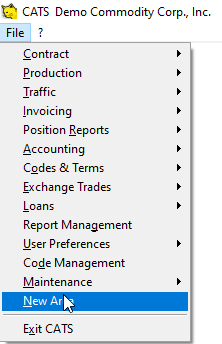
To work in the isolated area, go to File > New Area.
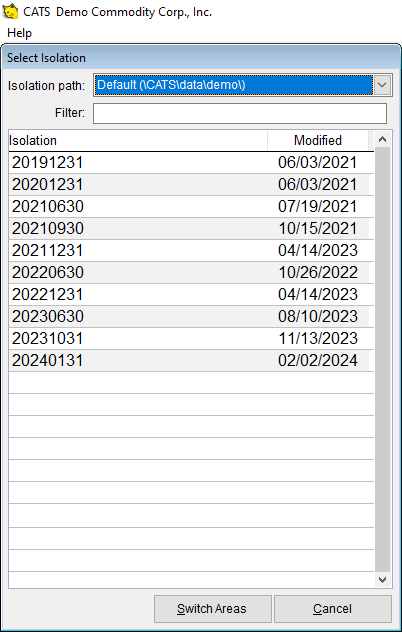
Next, select Isolated Period from the list to see the list of periods.
Finally, choose an isolated area to enter. The latest ones will be on the bottom.
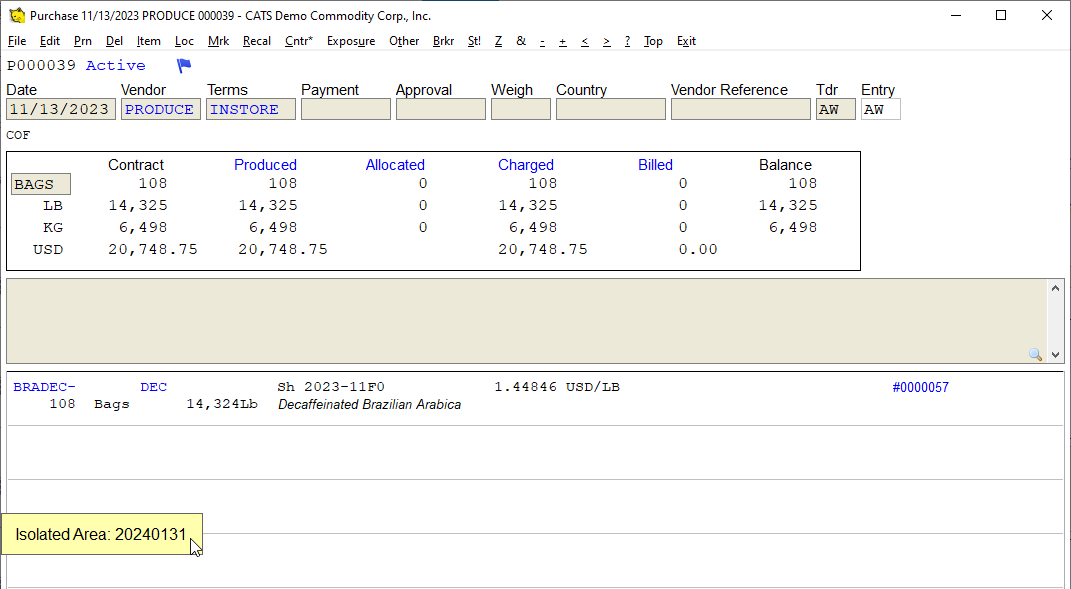
While in the area, a message will display in the top right to warn you that you are working in an isolated period and your changes will NOT be saved to the current area.
To return to the current area, go to File > New Area and select the main area for your company. You can also simply Exit CATS and log back in and you will be working in the current area.
Reindexing the Isolated Area
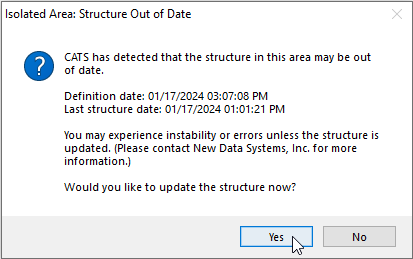
After receiving a CATS update or while working in an older isolated area, you may receive a message that the structure in that area needs updating. This simply means that some files have changed some element of their database - added or deleted a field, changed lengths of fields, etc. We highly recommend reindexing to allow access to all features of CATS in the isolated area.
This can be done very easily by following the prompts on screen.
Select Yes when prompted by the warning.
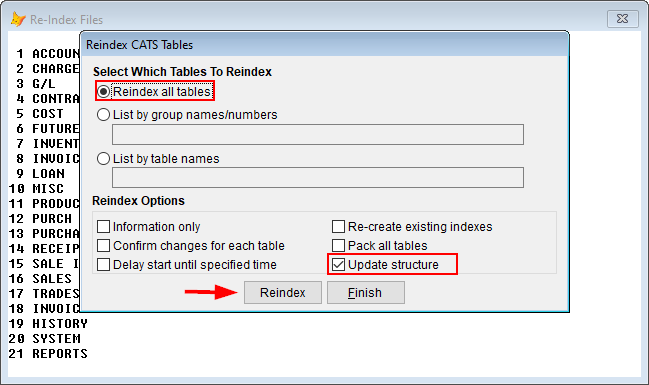
Leave the settings exactly as they are, and pick Reindex.
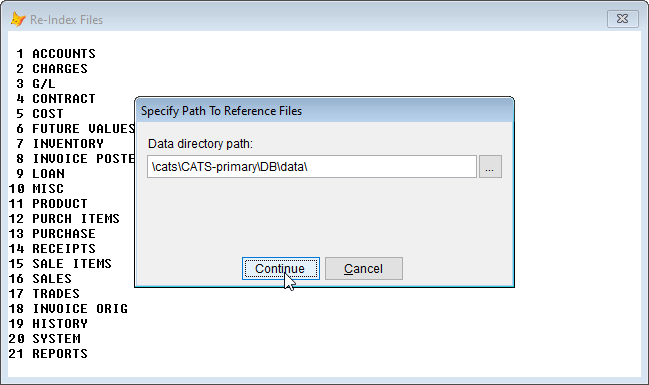
You may be prompted to choose the file location. Leave it as the default area and pick Continue.
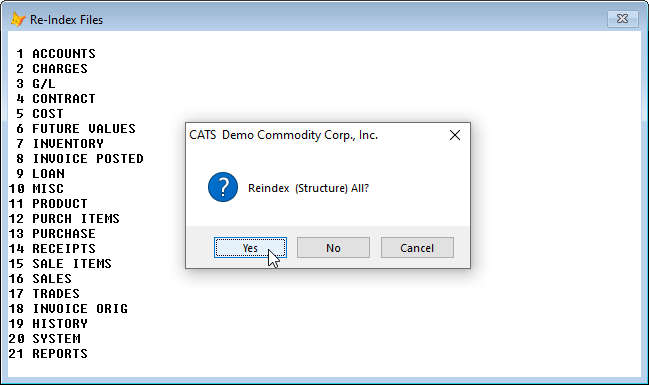
Select Yes when asked to confirm reindexing all files.
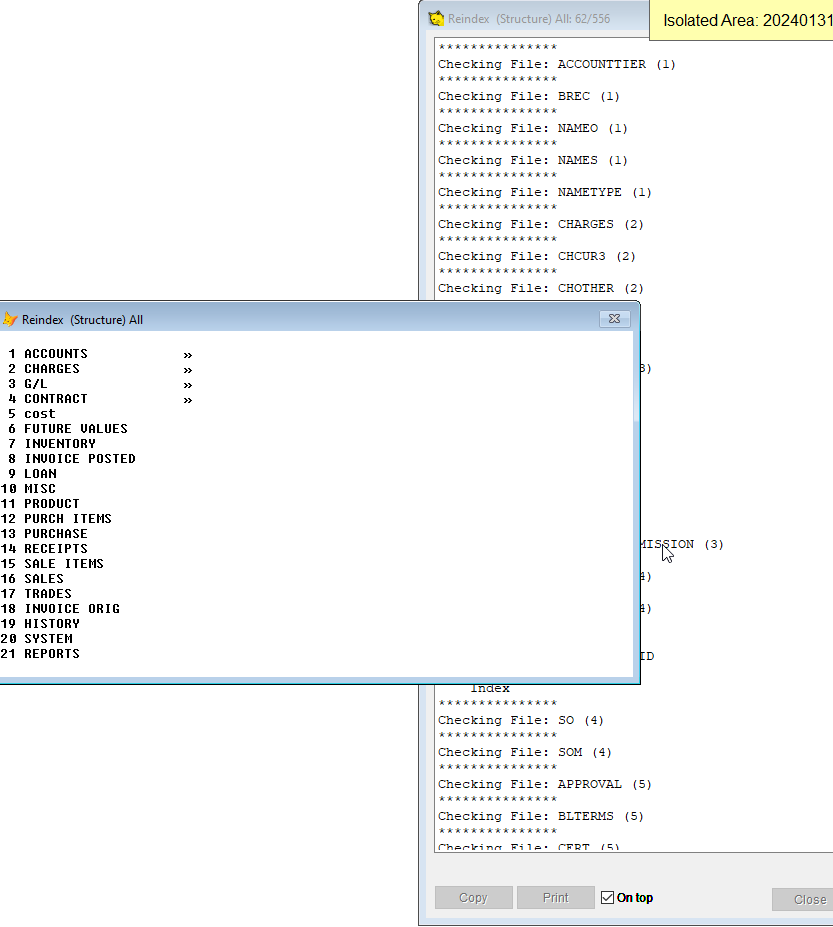
A progress report will show on screen. It will close when finished and you will be in the isolated area.
The isolated area will pop up and you can work as usual.
This process only needs to be done when prompted.
