Document Manager
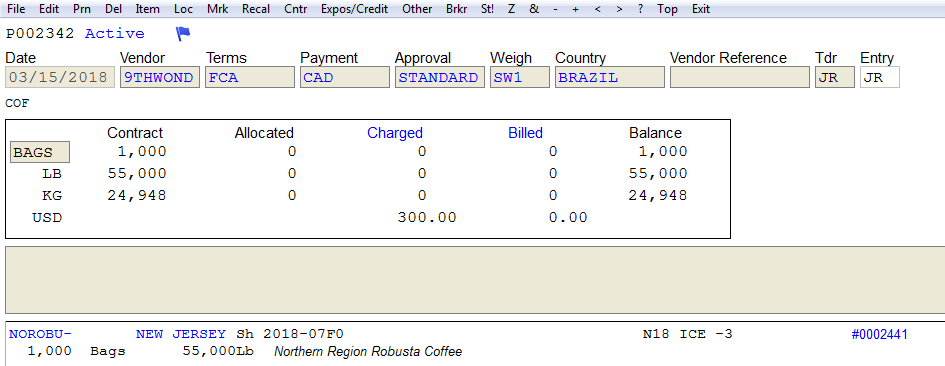
This CATS feature allows a user to attach any file type (image, pdf, text etc.) to a screen in CATS. This copies the file into a folder on your network drive, allowing all CATS users to access that file through Document Toolbar.
You can attach documents to any of the following screens in CATS:
- Contract Main/Contract Confirm Screen
- Contract Item Screen
- Location Screen
- Traffic Form Screen
- Production Screen
- Account Review Screen
- Invoice Screen
- Sampling Screen
Add an Attachment
In CATS, navigate to the screen to which you want to attach a file.
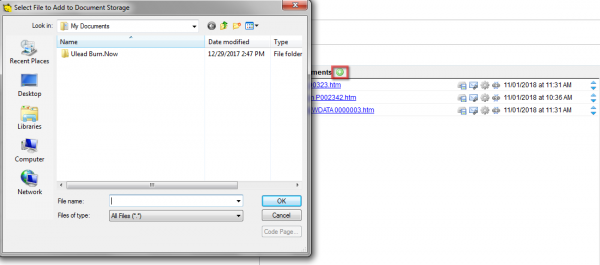
In Windows Explorer, navigate to the folder that contains the file you want to attach. Drag and drop the file(s) that you wish to attach from Windows Explorer onto the CATS screen.
By default, CATS will store the file using the file's original name. You can enter a different name here and specify the starting position for the file and press Apply to continue.
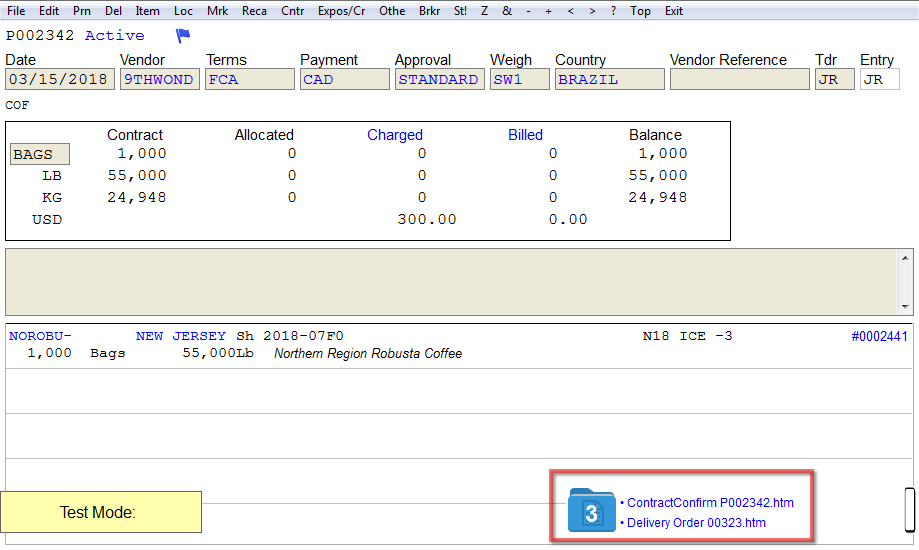
If this is the first file attached to this CATS element, a blue folder will appear on your screen.
The Documents Toolbar
The Documents Toolbar allows you to review and manage the documents attached to the current screen. If no documents are attached, the Document Toolbar will not be displayed.
The number on the blue folder represents the total number of documents attached to the current screen. For convenient access, the top two documents currently attached to the screen are displayed next to the blue folder.
Clicking on the file name will open the document. In the example below, clicking on the link labeled ContractConfirm PO002342.htm will display that file in your web browser.
Managing Attached Documents
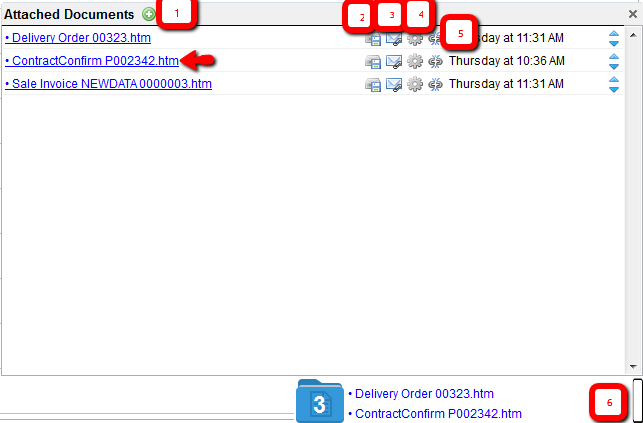
Clicking on the blue folder icon in the Documents Toolbar will open up the attached documents interface. From here you can manage the documents by clicking on the appropriate icon.
- 1 (Add) - Use the + sign to Attach additional files using Windows Explorer. Click for screenshot
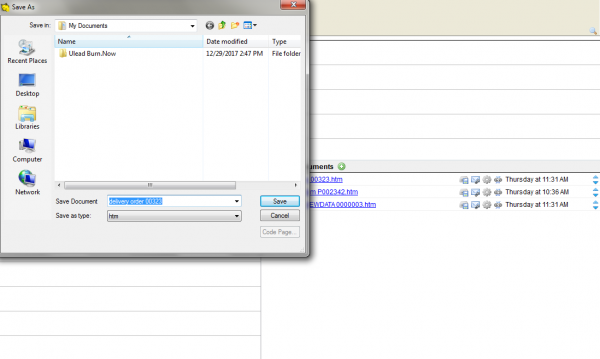
- 2 (Save) - Use the disk icon to Save the file to another location. Click for screenshot
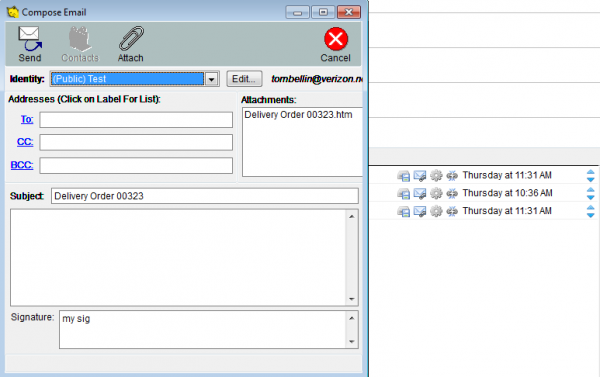
- 3 (Email) - Email the document. Click for screenshot
- 4 (Settings) - Use the gear icon to open the Settings box Click for screenshot
- Change the Name of the file as it is displayed in CATS.
- Change the Position of the document in the list:
- First: Moves the document to the top of the current list.
- Last: Moves the document to the bottom of the current list.
- Up/Down with Number: Moves the file up or down by the number you enter in the space provided.
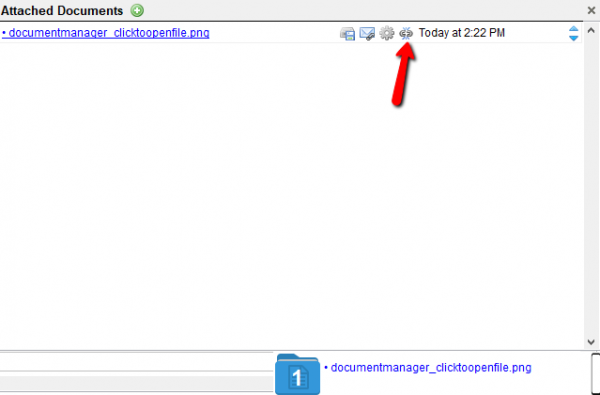
- 5 (Unattach) - Click the broken link icon to Detach the file from this screen. Click for screenshot
- 6 Collapsing the Document Toolbar: If you wish, you can collapse the Document Toolbar so that only the blue folder icon is displayed. Click on the “blank” button on the bottom right side of the screen to collapse the attached documents box and leave just the blue folder on the screen.Click for screenshot
