This is an old revision of the document!
Managing Sampling in CATS
This section has information on adding and reviewing sampling results, including attaching specific traffic marks to the samples.
Sample entries allow you to record details about the sampling of specific traffic material. You can record key dates, sampler notes, and the overall status of each sample. This information can be tied to specific traffic marks, making the sampling results for any material quickly available from the corresponding traffic screen.
Adding Sample Entries
You may add received or outgoing samples. Received samples are sent to you to test and buy. Outgoing samples are sent out to a perspective buyer to test.
To add a received sample go to, Traffic > Sampling > Add Sample > Received Sample.
Or to add an outgoing sample, go to Traffic > Sampling > Add Sample > Outgoing Sample.

Batch Sampling
This is the grid to add the batch process entries. Enter criteria for the sample you are adding.
- Status, Sample Reference and Date are CATS generated.
- Sample Type, Supplier, Product and Units and Measure must be filled in.
- Contract Number, Customer Reference, Country etc. are optional.
Click in any box and start typing to add a sample.

For example, click in the sample type box. Type in the sample type code. Or you can type in one letter, press enter and then select your sample type form the pop up box. Select your sample type and press Continue.

Continue to enter criteria for the sample. Once you have added the samples, select Save on the top menu.

CATS will save the samples.

Sample Management Screen
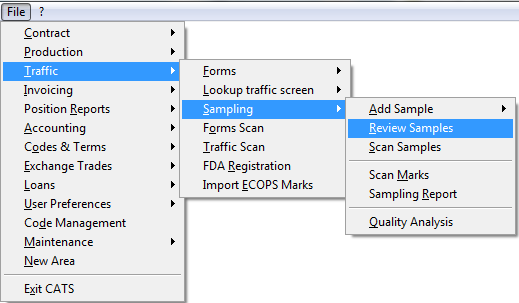
You can review or edit a sample at any time. Select Traffic > Sampling > Review Samples.
Select the sample entry to review and press Continue.

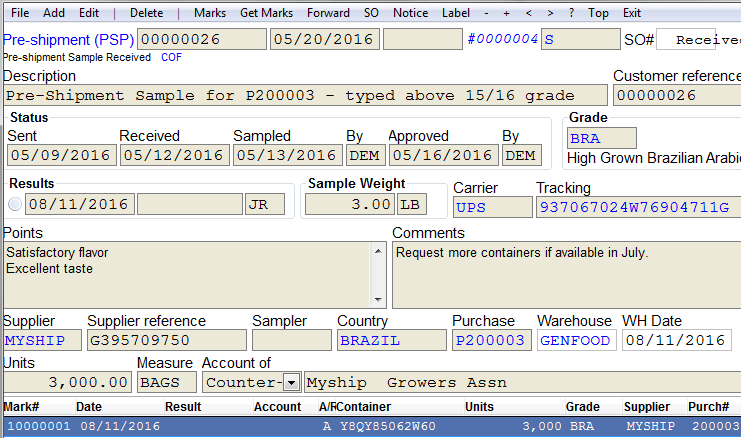
On the sample management screen, you can see the status of the pre-shipment sample entry you have added.
From the the top menu bar you can Add, Edit or Delete the sample.
Choose Edit to make any changes or add additional criteria to this sample.

Once you edit a sample, choose Save on top menu bar.

Your changes will be shown on the sample management screen.
Working With Sample Marks
A sample can be designated for one or more sample marks and each mark can have its own result. (This allows the sampler to apply different results to different material from the same sample). Every sample added should have at least one mark.
To attach traffic marks from an existing traffic screen to the sample select Get Marks. CATS will display the marks for the contract specified on the sample entry.
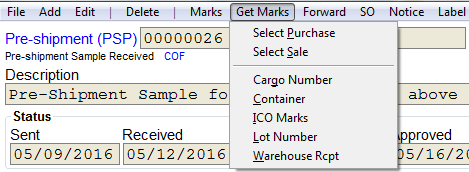
Rather than selecting by traffic screen, you can also search for existing material using the Cargo Number, Container, ICO Marks, Lot Number, or Warehouse Rcpt numbers.
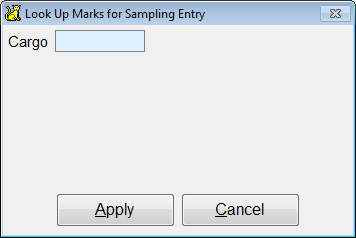
CATS will present a list of the material with matching identifier.
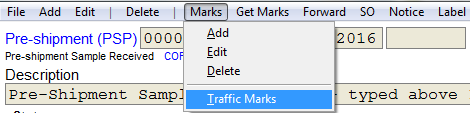
For traffic marks added using the Get Marks feature, you can also pull up the traffic mark itself by selecting Marks > Traffic Marks from the menu. This will bring up a list of all the traffic marks that are on the current sample entry.
Select a traffic mark and Continue.
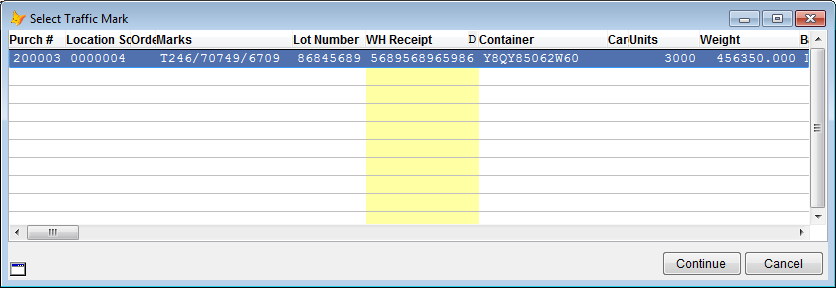
CATS will display a dialog with the traffic mark information for the selected record.
Finally, you can add line item to the sample manually by selecting Marks > Add from the menu.
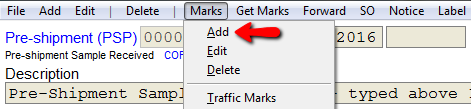
Enter info and press Apply.

This entry will not be tied to any traffic material, so is best used for situations where you're sampling material without a purchase contract or if you want to enter a multiple results for the same sample.
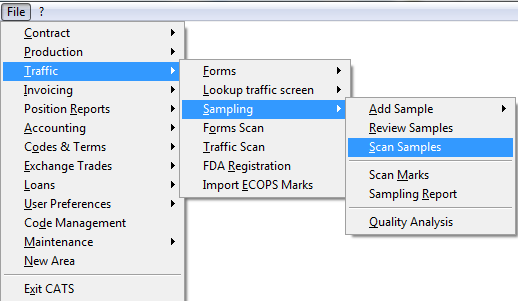
Scanning the List of Sample Entries
To see a list of all samples go to, Traffic > Sampling > Scan samples.
The list of samples will show. You can Add, Review or Edit the scans from the top menu bar.
- Add - To add a new sample.
- Edit - Choose edit to make any changes or add additional criteria to this sample.
- Delete - Will delete this sample entry.
Press Exit to return to main menu.

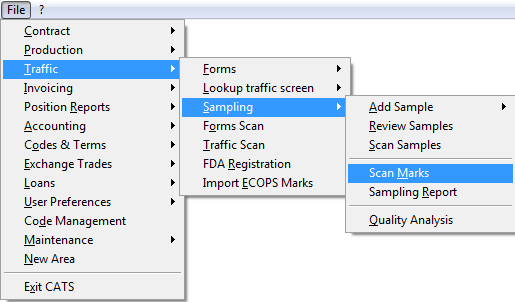
Scanning Marks
Use the scan marks tool to see detailed records of all traffic marks attached to a sample. Go to Traffic > Sampling > Scan Marks.
Here is a list of all marks.

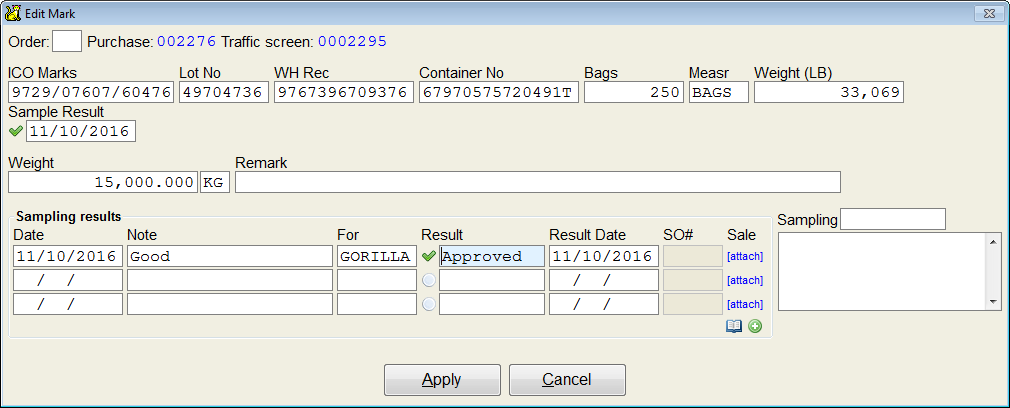
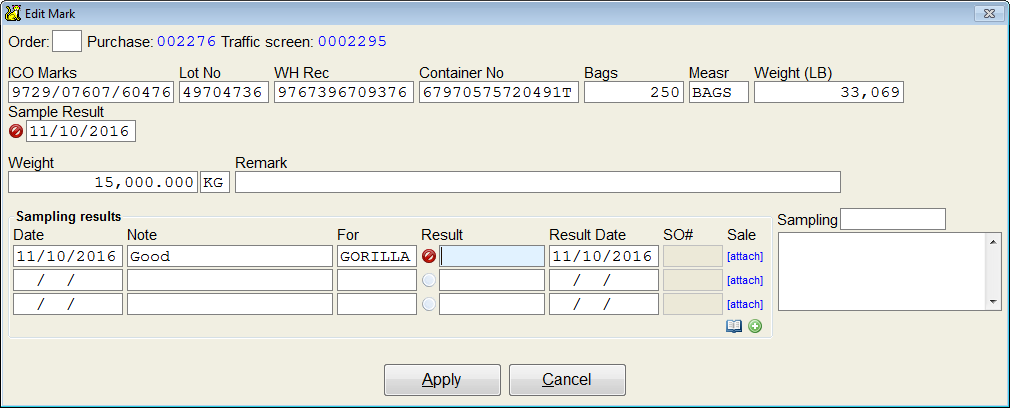
Adding Sampling Results directly to Marks
You may want to show something has been sampled without creating a sampling order. You can add the sampling result directly to the mark. You can also approve or reject the sampling result from here.
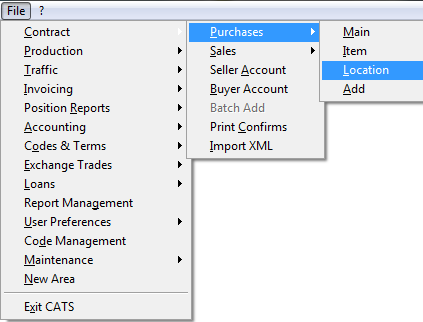
Go to Contract > Purchase > Location.
Choose the contract specific to the mark you are adding to.

Double-click on the mark.

Add in the sampling results on this page.
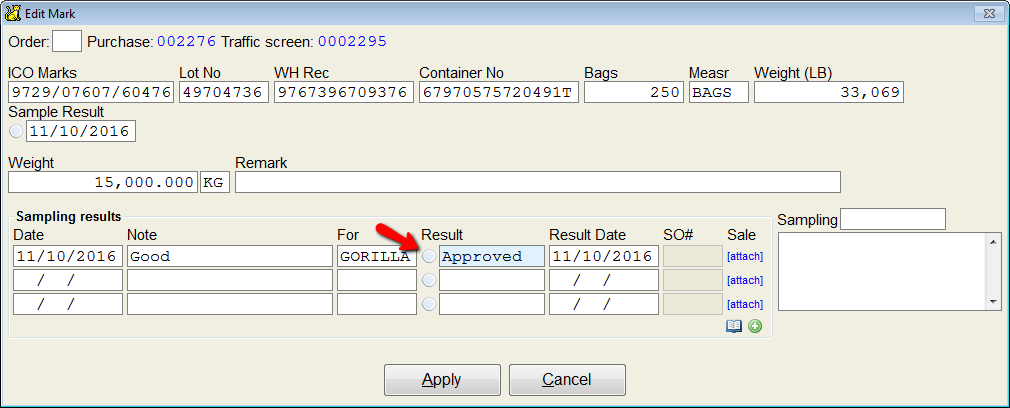
Once you add the sampling results you can leave it as pending, or approve or reject it.