Table of Contents
Vendor Invoices - Payable Grid
The payable grid invoice allows the entry of Vendor Invoices using a grid-style entry that can be more efficient when entering an invoice for a large number of costing items.
Creating a Vendor Grid Invoice
CATS uses a special invoice type (VV) to identify the payable grid type. Other invoice types will use the standard dialog interface for adding items. Below are the steps necessary to create a new vendor grid type invoice.
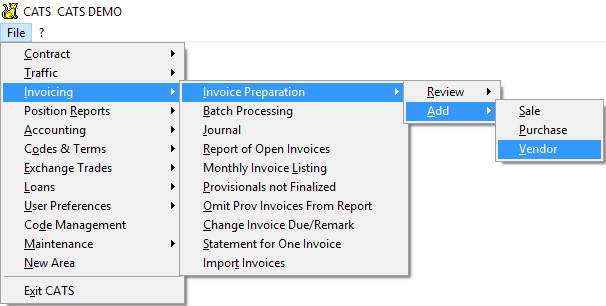
Step 1. Add Vendor Invoice
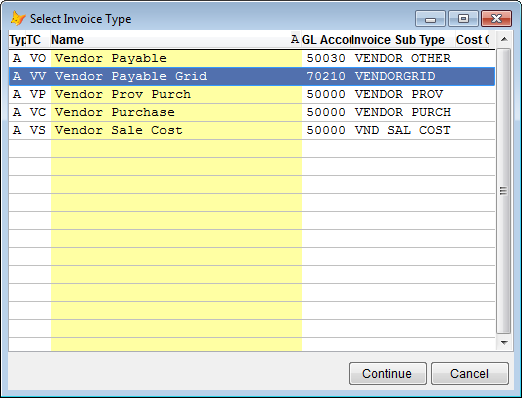
Step 2. Select Invoice Type
Select invoice type Vendor Payable Grid and press Continue.
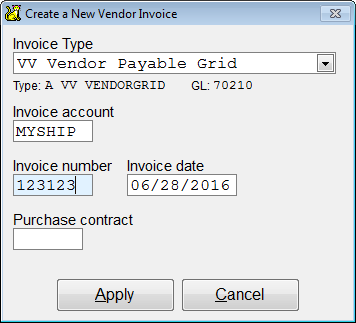
Step 3. Enter Invoice Information
Enter the vendor account code, vendor invoice number, the invoice date, and (optionally) the contract number.
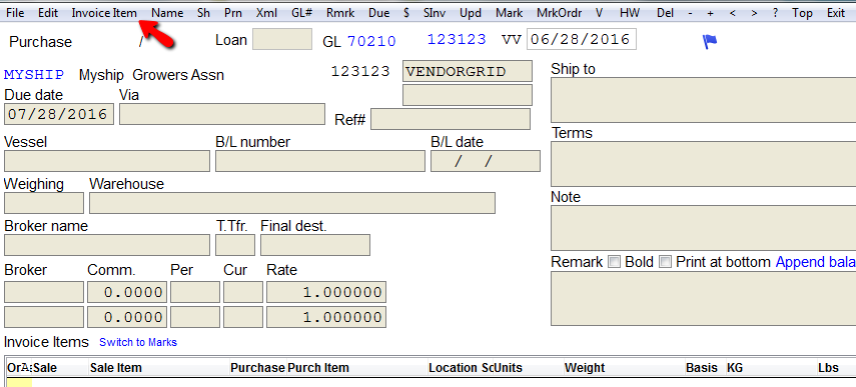
Select Apply to continue and CATS will create the invoice and show you the invoice review screen.
Accessing the Items Grid
On the main invoice screen, select Invoice Item > Add Item from the menu.
This will bring up a list of all the items on the invoice. It is possible to add, edit, and delete each item.
Items Grid Features
The following menu items are available on the items grid:
- Add - Add a new blank item to the list.
- Copy - Copy the currently selected item and create a new entry.
- Delete - Delete the currently selected item.
- Tools > Import from Traffic Report - Import a list of entries using the result of a traffic report.
- Tools > Set Price - apply a single price to the items in the list.
Add
Line items can be added manually by selecting Add from the top menu. Fill in the purchase contract number and select the purchase item the line item will apply to (if only one item is present on the contract that item will be entered automatically).
Enter the cost-code and the GL#. You can also enter the total price for that line item.
Copy
Select Copy from the menu to copy an the currently selected line item. This will create a duplicate entry. Depending on the type of invoice, you may want to change the contract, price or cost-code information.
Delete
Select Delete from the menu to remove the currently selected line item.
Import Line Items from a Traffic Report
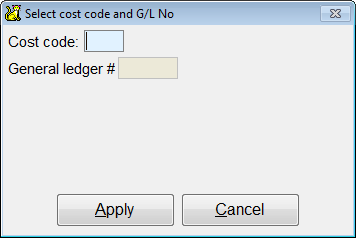
To import items from a traffic report, go to Tools > Import from Traffic Report.
Enter the cost code and GL number and press Apply.
You will return to the invoice items screen. Here you will see the items from the traffic report that you have added.
Apply a Total Amount
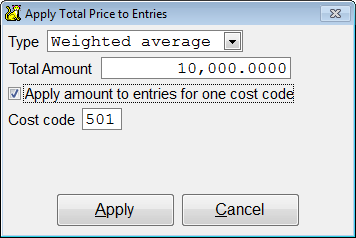
To apply a total amount to these invoice items that you added, go to Tools > Set Price.
Type
This determines the mechanism CATS will use to apply the entered price to the items.
- Weighted average: applies the price across all items based on the total weight of the items.
- Average: applies the average price across all items.
- Per Item: applies the price as entered to each item.
- Per Pound: calculates a total price using the price entered as a price-per-pound price.
Total Amount
Enter the amount to apply to the items on the invoice.
Apply amount to entries for one cost code
Restrict the amount applied to only a certain cost code. Uncheck to apply the total amount to all items.
Cost code
Specify the cost code to apply the total price to.
Select Apply to apply the total price to the items.
Finishing Up
Once you have finished with your entries, select Exit from the menu to return to the invoice screen. The entries will be rendered on the screen as normal invoice items.
Vendor invoices need to be printed and posted to the General Ledger just as purchase and sales (inventory) invoices do. You must print an invoice before you can post it. Printing and Posting Invoices
