Creating a New Report in CATS (Old Report Designer)
CATS allows full customization of reports. In addition to numerous filters and report types, you can change the way CATS displays the information generated as reports. This guide will get you started with understanding how report styles work and how you can use them to make the most of CATS reports. Users can change the filters, columns, and order format to control which records, which information about those records, and in what order records are displayed on the report. This page will serve as a detailed description of how to create a new report format in CATS.
Adding a Traffic Report
The first step is determining what type of report you want to use. Most of the time, you will be using a report from the Position Report area. These reports display your position based on either the contract items or location screens. For the purposes of this tutorial, we will be taking a look at creating a traffic report. Traffic reports use information from location screens to display your current position. A single traffic screen is considered one record on the report.
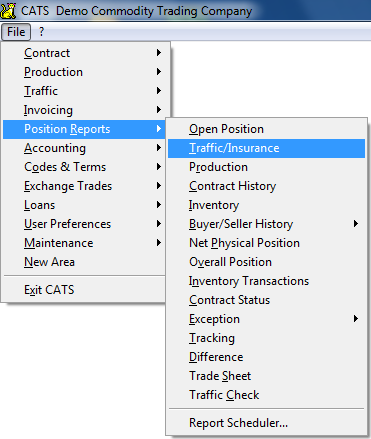
From the main menu, pick Position Reports > Traffic/Insurance.
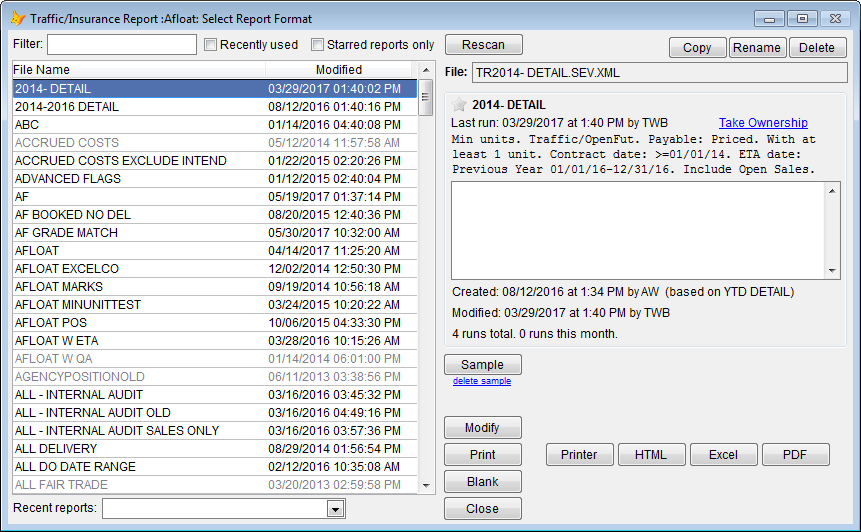
CATS will display a list of previously created and saved formats to choose from.
All reports in CATS are stored as saved report formats. There is no limit to the number of formats you can store in CATS. Users can also take ownership of report formats and prevent other users from changing them.
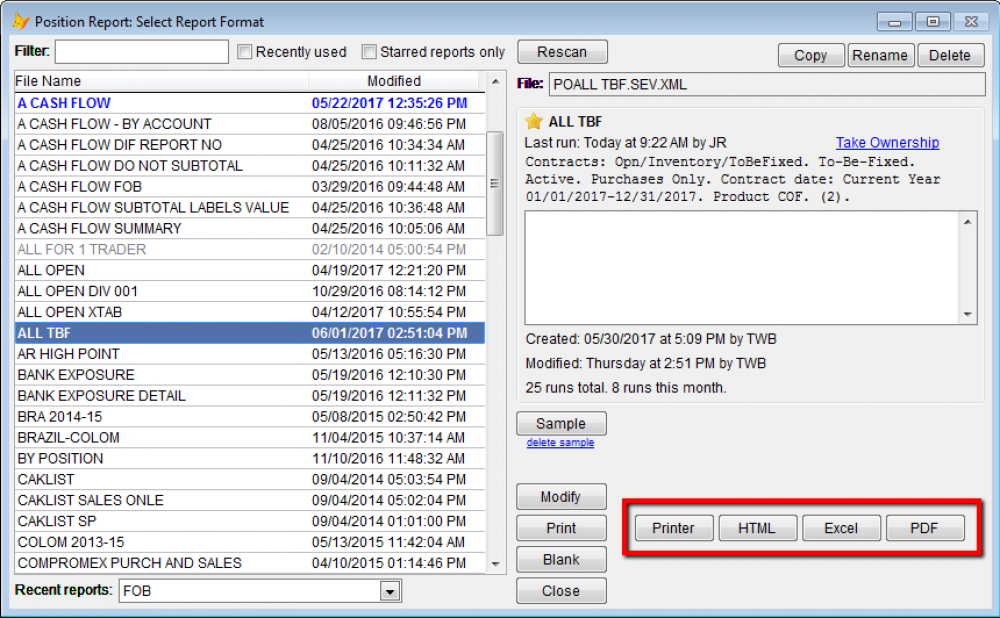
To Modify an existing report, choose the Modify button. We will create a new report by clicking on the Blank button. To print without changing any parameters, choose a print option next to the Print button. Print options include Printer, HTML, Excel or PDF. Items highlighted in blue in the list indicate a favorite report for your user ID. See wiki Recent and favorite reports for more details.
Setting Report Filters
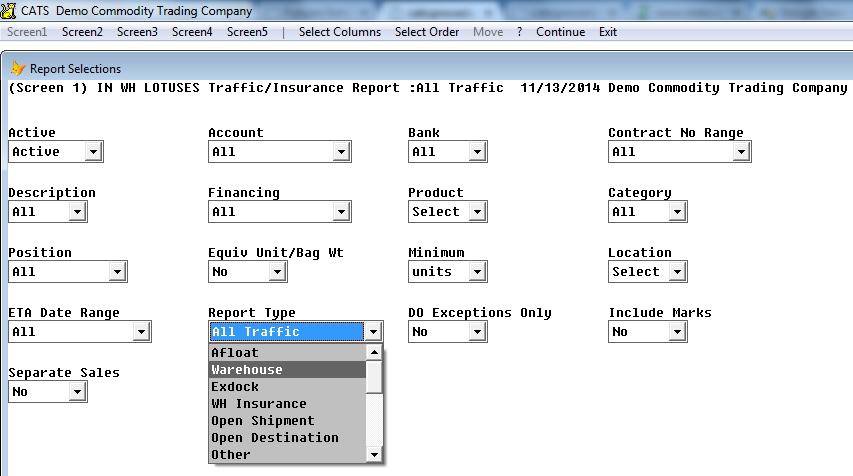
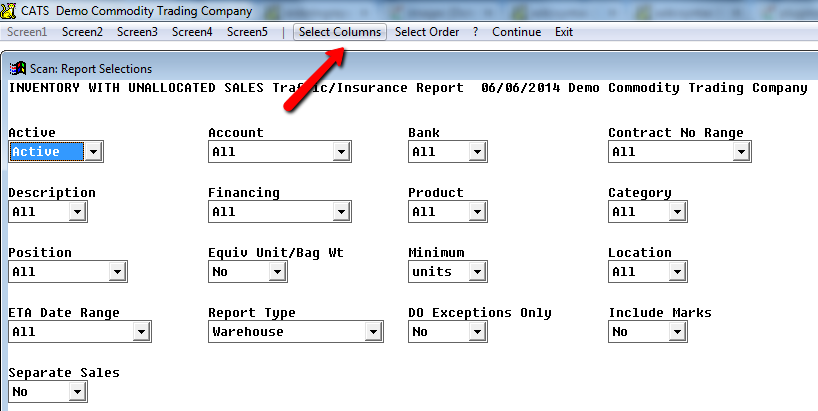
CATS will show you a screen of the most important filters you can select to limit which records will appear on this report.
For the traffic report, there are four screens of filters (also called parameters). We will explore the most frequently used filters here. For more detailed descriptions of all options, see List of Report Filters.
For every report selection, the option selected will display in the drop-down window directly to the right of the option title, as shown for the Active option below.
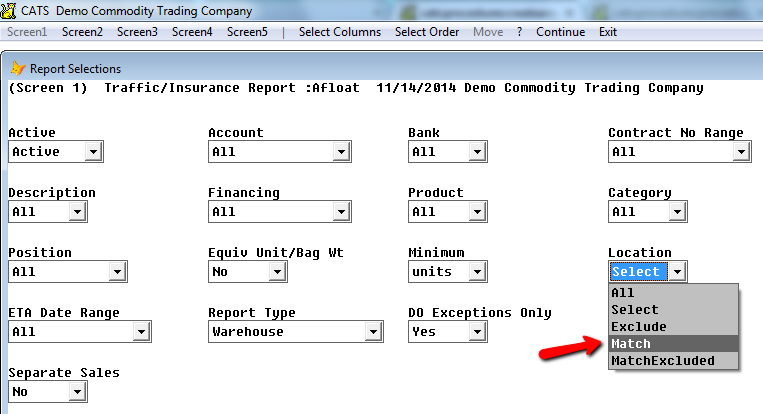
On the traffic report, you can decide what type of traffic information you want to see, such as material in Warehouse, material Afloat, or material that has no Traffic Information. This option is called the Report Type and we will select Warehouse.
This will show us everything that has WH displayed in the first field location field, often called Loc 1, on the location screen.
Another way to filter is to select all records that match a code, or to exclude all records that match a code in any field in CATS.
For example, we can use the Location filter to choose records for the report.
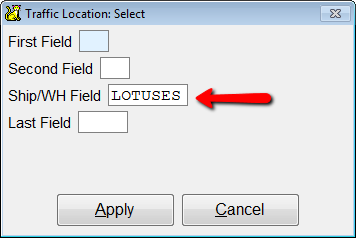
Select will let us enter the specifics of these four fields and only show us items that match these parameters. In this example, we have entered one Ship/Wh code. The Exclude option works in the same way.
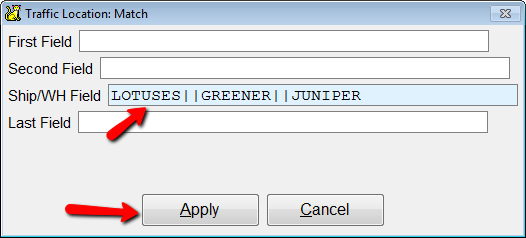
If we pick Match, we can write in the codes of several warehouses whose records we want to see, separated by a || character. MatchExclude works in the same way.
When finished with the filters on Screen 1, select Screen 2 from the toolbar menu.
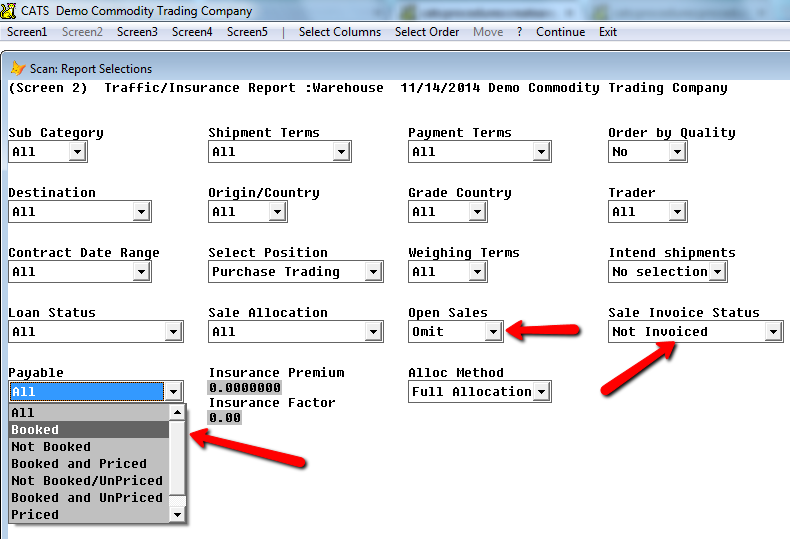
CATS will show you more options for narrowing down the records you will see on this report.
There are a few important parameters to check here:
- Open Sales: Include or Omit, which can let you match purchases in inventory to open sales items.
- Payable status, which lets you choose to see records based on if the location screen has a purchase invoice attached to it.
- Sale Invoice Status, which lets you include or exclude records based on the presence of a sale invoice on the location screen.
Screens 3 and 4 show more parameters. Unless you are searching for a specific filter (such as ETA Date, filter by Flag, etc.), you will not typically need to change these options.
Display and Style Options
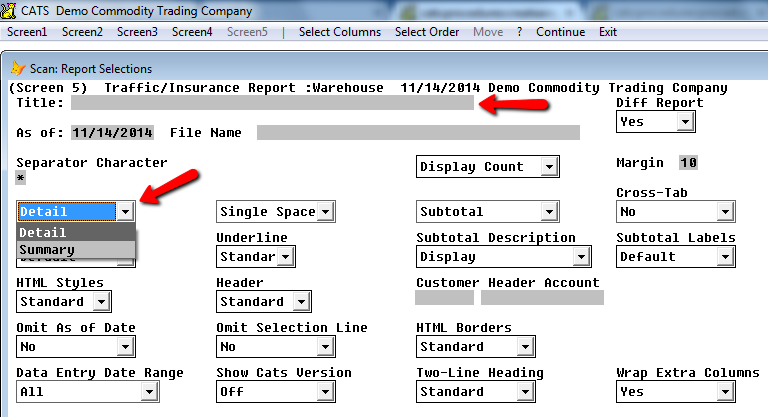
When you have finished choosing options on Screens 1 through 4, you can click on screen 5, which shows display and style output options. You can choose to print a Detail report or a Summary, enter a Title for CATS to print on your report, or many other choices.
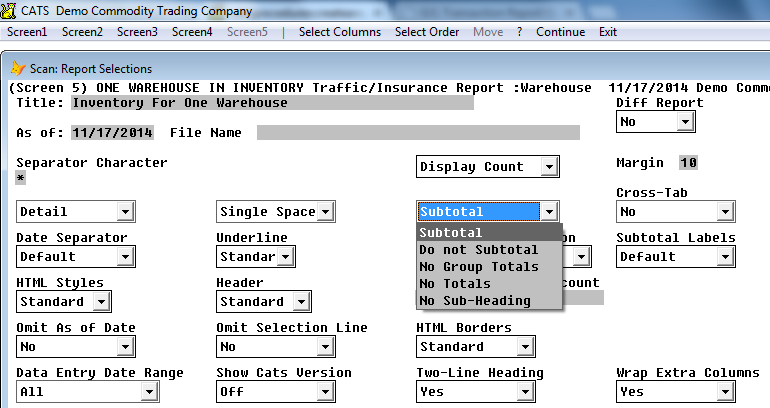
Another option to review is if you want to see subtotals on the report.
Changing the Order and Columns on Reports
When you have finished choosing filters, the next step is to Select your Order and Columns. Columns are the details that CATS will show about each record. The Order controls how records are grouped and in what order they are displayed within each group.
Report Orders and Subtotals
CATS can display the information on its reports in groups with accompanying subtotals.
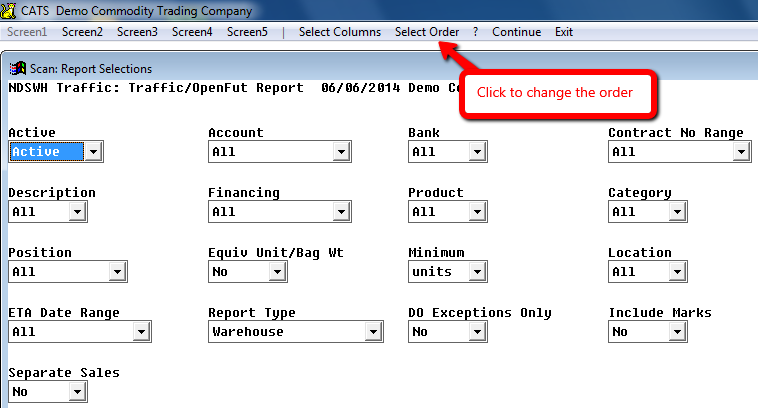
From the top menu above the record selections window, pick Select Order.
CATS will list all of the orders available for this report.
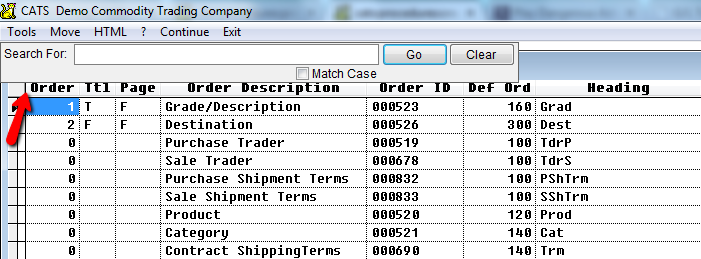
To add an order to the report, put a number next to that order in the Ord column. CATS will operate on that order starting with 1. Orders with a 0 next to them mean that order is not selected.
To re-order this list by the Description column to make items easier to find, click on that column heading. Click the Ord column to return to normal viewing.
You can also use the Search box to seek part or all of an Order's Description.
Putting a T in the Ttl column tells CATS to subtotal by that order. We have put a T next to the Grade order. In the example shown here, this means that CATS will order the records it finds by Grade (purchase description), then within each grade, by Destination. The F indicates that there will be no subtotal.
Putting a T in the Page column tells CATS to initiate a page break when printing to a printer. There is no page break when printing to HTML.
When you have finished selecting orders, pick Continue from the top menu to return to the record selection screen.
Columns on Reports
You can choose which information to display about the records on your reports using the column selection feature. Columns are shown left to right across the top of the reports.
From the menu above the record selections screen, pick Select Columns.
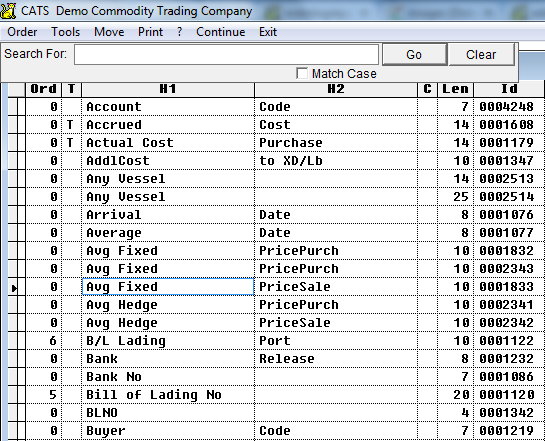
CATS will display a list of columns available for each report type.
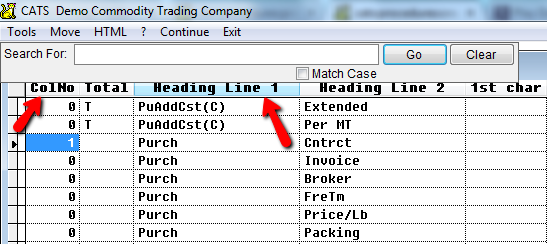
Enter a number next to each column you wish to see on the report. Columns with zeroes will not be displayed. The column with the lowest number will be on the left. If you have chosen to print a Marks Report, you will see mark details as columns you can select in this list.
You can also use the Search box to find all or part of a column description.
To re-order this list by name, click on the H1 heading.
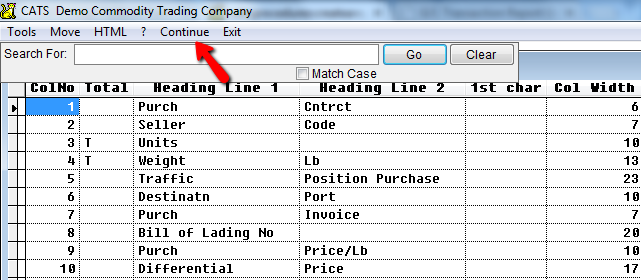
When you have finished adding columns to the report, pick Continue to proceed.
Save and Print the Report
From the record selection screen, pick Continue to proceed with saving and printing the report.
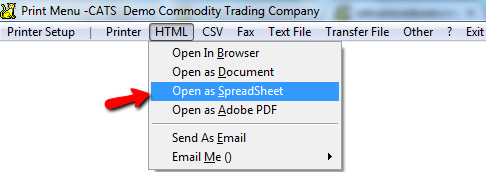
CATS will display the output selection menu. For this instance, we will choose to open this report as a spreadsheet by picking HTML > Open As Spreadsheet.
You will be prompted to enter a save name for this report. Names should be descriptive to make it easy for you to identify what the report does. Click Save to continue.
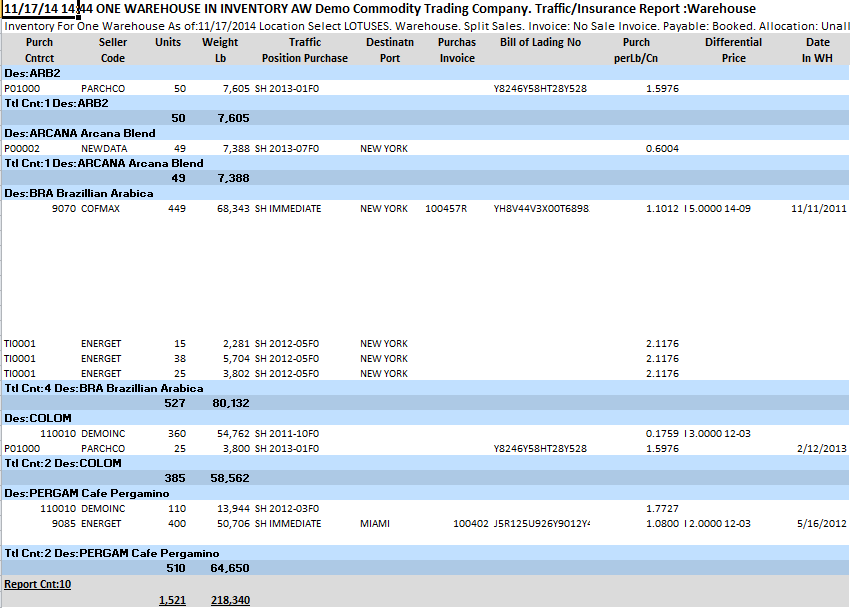
CATS will open the report in your spreadsheet viewing program (or in your browser if no program is installed).
The filters are listed on the report under the printing details, just above the headings. The number of records and order is displayed as well.
Now you have created a report in CATS.
Marks Columns
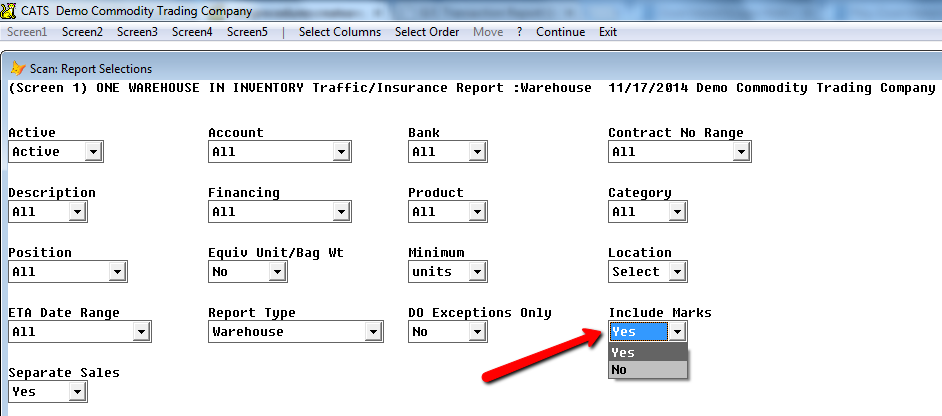
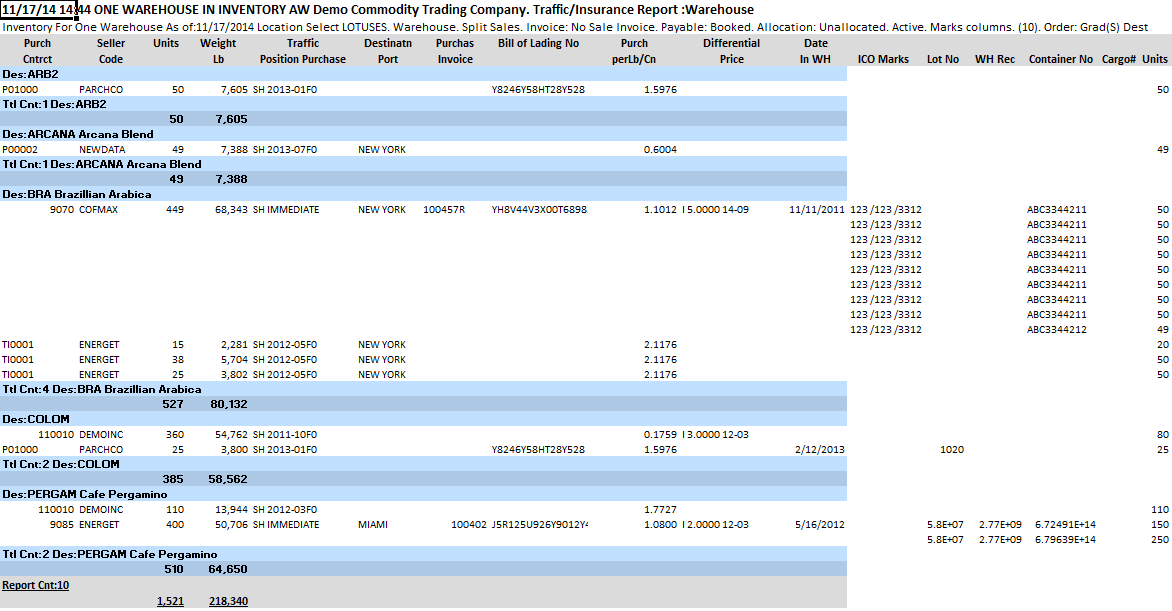
CATS also has the option to display marks on certain reports, such as Traffic, Open Position, and Inventory reports. These columns can be set up in a different area of CATS. If you have chosen Yes under the Include Marks option on Screen 2, the marks columns will be added to the right of your last picked column.
Here is a report with marks included.
