Sampling
If you want information about managing samples in CATS, go to wiki page Managing sampling in CATS. For information on how sampling interacts with traffic, see below.
CATS can manage the samples that you send to your customers and track their responses. This is independent of your own internal sampling.
Each sample can have a status of “Pending” - “Accepted” - “Rejected”, depending on the result of the customer's sampling.

Samples are tracked per traffic mark (marks usually correspond to a specific container or lot but can be any size). Entering information in a blank row will generate a new sampling result entry.
 to create a new row.
Specify the status of a sampling entry by clicking on the result icon to toggle through the 3 stages (Pending: , Accepted:
 , or Rejected:
 ). CATS will update the result date when the status of the entry is changed.
You can “attach” a particular sampling result to a sale from the traffic mark by clicking on the [attach] link corresponding to the entry.
Along with the individual sampling entries, each traffic mark has an overall status which is set automatically when a sample is approved or rejected. (The overall result can also be manually modified). This information also appears on traffic reports.
A single traffic mark can have as many sampling entries as necessary, though only the latest three will show on the mark at once. You can see the full list of sampling entries for a mark by clicking on the book icon  .
.

Working With Sampling Orders
Sample results usually correspond to Sampling Order documents.
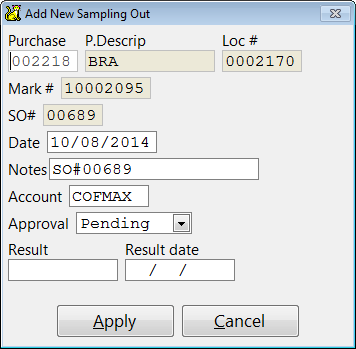
CATS will automatically generate sample result entries when a sampling order is created from the location screen or when new marks are added to a sampling order.
If you try to sample the same material to the customer, CATS will issue a warning and ask you to confirm your selection.
You can manage the sampling results for a particular sampling order by selecting Results from the order screen menu. This will bring up the sampling result scan showing all the entries for the current order.
The Sample Results Scan
You can access the sampling results scan from the main menu by selecting File > Traffic > Sampling > Samples Sent. This will bring up a list of all sampling results entered in the system.
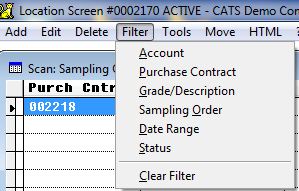
The scan provides a number of filters to assist in finding the record you want.
As with other scans you can add, edit and delete entries here.
The Tools menu allows you to perform result related functions:
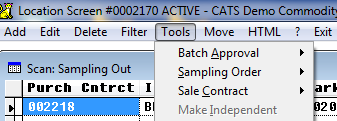
Tools menu.Batch Approval Sub-Menu
Use the Batch Approval sub-menu to convert all listed entries to a particular status.
Sampling Order Sub-Menu
Use the Sampling Order sub-menu to attach or detach the currently selected sampling result to/from a particular sampling order.
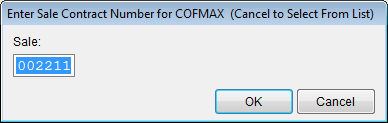
Sale Contract Sub-Menu
Use the Sale Contract sub-menu to attach or detach the currently selected sampling result to/from a particular sale.
Make Independent Option
The Make Independent option will detach the currently selected sampling result from its parent result. When a location screen is subdivided or a mark is copied, the sampling results for that mark are “cloned”. Any changes to the sampling status of any of the clones will be reflected on all of the clones. Use this option to specify that CATS should not update this sampling result in that way.
Sampling Report
Alongside the sample result scan, there's the Sampling Report which uses the CATS report designer to provide highly customizable reports of your sample results. To access the sampling report, select File > Traffic > Sampling > Sampling Report.