Report Scheduler
The report scheduler allows users to specify reports to be run on a schedule. (For example, running the open physical position report every morning.) Any report that can be designed and run from within CATS is available to be printed by the scheduler.
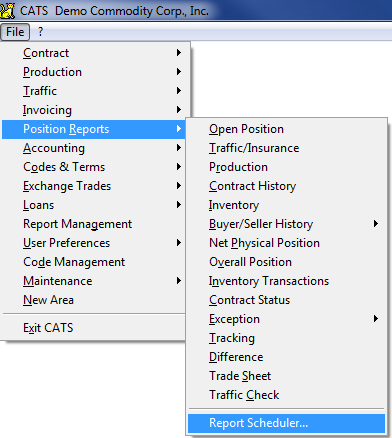
Access the report scheduler by choosing File > Position Reports > Report Scheduler from the main menu.
Report Listing
When you enter the report scheduler, CATS will display a list of the currently scheduled reports. For regular users, this list will contain only items scheduled by that particular user.
The report listing displays the current status of each item, including the next scheduled run for the report, the last successful run, the result of the run and the output type.
Menu options for the report scheduler is as follows:
- New Item: Create a new schedule.
- Delete Item: Delete an schedule.
- Copy Item: Copy a schedule item.
- Refresh List: Refresh the item list.
- Recent Reports: Shows any recently printed reports.
- Start Scan: Run report immediate.
- Exit: Take you back to the main menu.
See below for more details on each option.
Adding a Report to the Schedule
To schedule a report, select New Item from the menu.
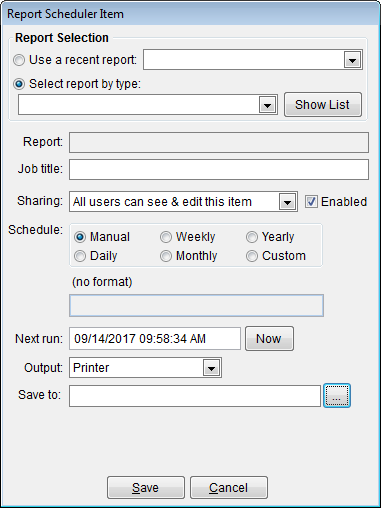
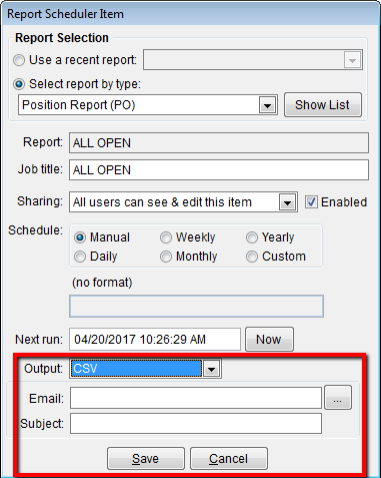
This will bring up an empty report scheduler item dialog.
The report scheduler item has the following options:
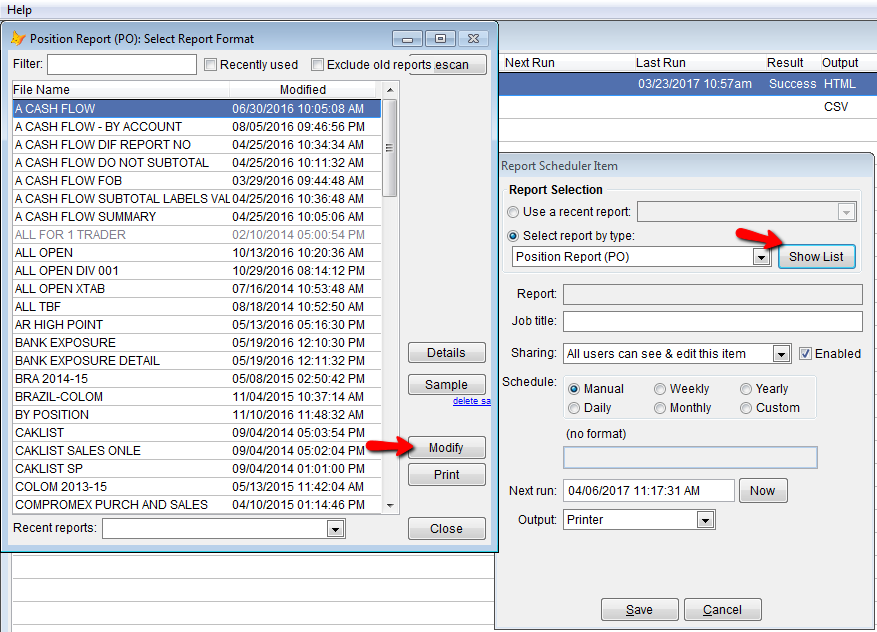
- Report Selection: Choose a recently used report or select report by type. Make your report selection. If you are selecting a report by type, choose the report, and then click Show List. Choose the file name and click Modify.
Additional scheduler options are as follows:
- Report: This option will automatically fill in when you choose you report type.
- Job Title: This option will automatically fill in when you choose you report type.
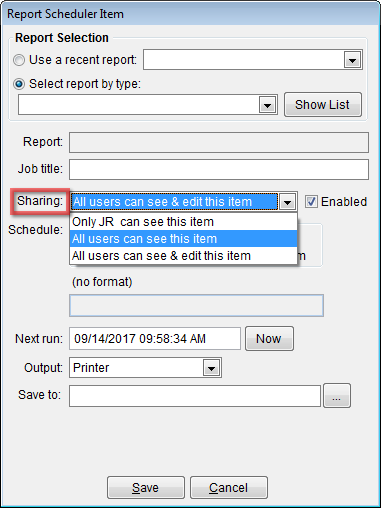
- Sharing:Allows control over what users can see or edit this report scheduler item.
- Enabled: Uncheck this box to disable a scheduler item.
- Schedule: Use this area to specify the interval for printing the reports. Reports can be scheduled on a recurring basis (Daily, Weekly, Monthly, Yearly or Custom) or set to be run Manually.
- Next Run: The calculated date and time that the report will next be run.
- Output: the type of output for the report.
- Printer: send the output to the default printer.
- HTML: send the output to a file
- CSV: send the output to a CSV file.
- Transfer: send the output to a transfer file that can be printed to a printer later.
- Save to: This features allows you to save the report.
Modifying a Scheduler Item
To modify a scheduler item, double-click on the item in the list.
Modifying a report presents the same options as adding a new item.
Scheduling
The following is a quick explanation of the different scheduling options:
- Manual runs only once. To run it again, enter the Report Scheduler and modify the item and click on Now.
- Daily runs at the specified time each day. (e.g. 8:00 - will print every day at 8 AM)
- Weekly runs at the specified time on the specified days. (e.g. MWF 16:15 - will print every Monday, Wednesday, and Friday at 3:15 PM)
- Monthly runs once a month on the specified day of the month at the specified time. (e.g. 15 10:30 - will print on the 15th of the month at 10:30 AM)
- Yearly runs once every year on the specified month, day and time. (e.g. 8 15 5:00 - will print August 15th at 5 AM)
- Custom reports will on an interval of the specified number of minutes. (e.g. 1000 - will print every 1,000 minutes).
Sending the Report as an Email Attachment
To have the report sent as an email, select HTML or CSV as the output type and then enter the email address and subject line. To send to multiple addresses select the … button next to the Email field and enter a list of addresses separated by commas.
